Vacuum Cleaner Component Separation Guidelines: Parts to Disconnect During Long-Term Storage
Discover the essential vacuum cleaner components you should disconnect before long-term storage to prevent damage, avoid mold growth, and ensure your vacuum works perfectly when you need it again.
This post may contain affiliate links. If you make a purchase through these links, we may earn a commission at no additional cost to you.
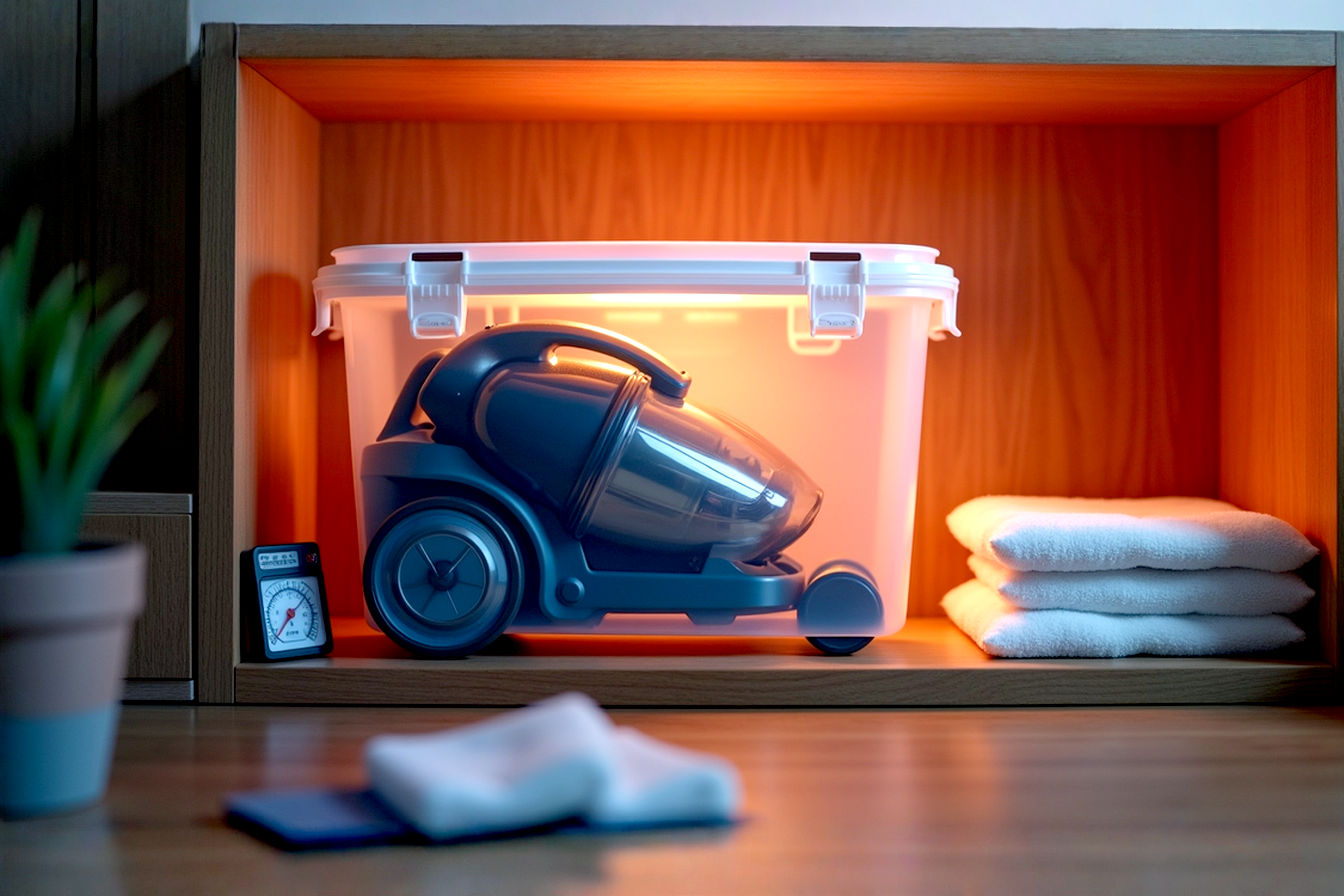
When your vacuum cleaner needs to be stored for an extended period—whether due to seasonal changes, moving, or simply having a spare unit—proper preparation is essential. Improper storage can lead to significant damage, including warped components, battery degradation, mold growth, and mechanical failures. By taking the time to properly separate key components before long-term storage, you’ll not only extend your vacuum’s lifespan but also ensure it performs optimally when you need it again.
This comprehensive guide covers everything you need to know about disconnecting and storing vacuum cleaner components. We’ll walk through each system—from electrical to mechanical—providing specific, actionable steps that apply to most vacuum models while highlighting important variations based on vacuum type.
Why Separate Vacuum Components Before Storage
Before diving into the specific components that require separation, it’s important to understand why this extra effort pays dividends for your cleaning equipment.
Preventing Mechanical Stress and Damage
Vacuum cleaners contain numerous interconnected parts that can experience stress when left assembled for long periods without use. Components like springs, belts, and gaskets can deform or lose elasticity when kept under tension continuously. Separating these parts releases this tension, preserving their structural integrity and functional properties.
For example, the brush roll belt in an upright vacuum is designed to operate under tension during normal use, but this tension becomes problematic during extended storage. When the belt remains stretched around the motor shaft and brush roll for months, it can develop permanent deformation, leading to slippage or breakage when the vacuum is eventually used again.
Avoiding Battery Degradation
Modern cordless vacuums rely on lithium-ion battery technology, which requires specific care during long-term storage. Batteries left in unused devices can deteriorate significantly, losing capacity or developing internal damage that compromises performance and safety.
Lithium-ion batteries ideally should be stored at approximately 40-60% charge capacity in a cool, dry environment. When left installed in a vacuum cleaner, these batteries are subject to slow discharge and potential deep discharge, which can permanently damage battery cells and reduce overall capacity.
Preventing Mold and Odor Development
Vacuums collect organic matter during normal cleaning operations. Even after emptying the main collection container, microscopic particles remain trapped in filters, hoses, and internal pathways. In humid storage conditions, these residual particles can become breeding grounds for mold, bacteria, and unpleasant odors.
The confined spaces within vacuum components create perfect environments for microbial growth when combined with moisture and organic material. By separating and thoroughly cleaning components before storage, you eliminate these growth conditions and ensure your vacuum remains sanitary and odor-free.
Extending Vacuum Lifespan
Regular maintenance, including proper storage procedures, can dramatically extend a vacuum cleaner’s operational life. Most manufacturers design their products for 5-8 years of regular use, but with appropriate care and component separation during storage, many high-quality vacuums can remain functional for 10-15 years or longer.
This extended lifespan represents significant value, especially for premium vacuum cleaners that may cost hundreds of dollars. The minimal time investment required for proper storage preparation yields substantial returns in equipment longevity.
Cost Savings Through Proper Maintenance
Replacing a prematurely damaged vacuum or its key components can be expensive. Common replacement parts like motors, batteries, and electronic control boards can cost up to 50-70% of a new vacuum’s price. By preventing damage through proper storage techniques, you avoid these unexpected expenses and maximize your original investment.
Additionally, warranty coverage may be voided if damage occurs due to improper storage or maintenance, making prevention even more financially important.
Essential Components to Disconnect: Electrical Systems
Electrical components deserve special attention when preparing a vacuum for long-term storage, as they’re particularly vulnerable to damage and can pose safety risks if improperly stored.
Battery Removal and Storage Procedures
For cordless vacuum models, battery removal should be your first priority.
Step-by-step battery removal:
- Ensure the vacuum is powered off completely
- Locate the battery release mechanism (typically a button or latch)
- Remove the battery pack from the vacuum body
- Check the battery charge level (aim for 40-60% charge for storage)
- Clean the battery contacts with a dry cloth
- Store the battery in a cool, dry place away from metal objects
For optimal battery health, most lithium-ion batteries should be stored between 40-60% charge—not fully charged or completely depleted. This middle range minimizes chemical reactions within the battery cells that lead to capacity loss. The ideal storage temperature for vacuum batteries is between 50-70°F (10-21°C), with relative humidity below 60%.
Some vacuum manufacturers recommend recharging stored batteries every 3-6 months to prevent complete discharge. Consult your specific model’s manual for manufacturer recommendations.
Power Cord Management
Corded vacuums present different challenges for electrical system storage:
- Unplug the vacuum completely before beginning any storage preparation
- Inspect the entire length of the cord for damage, cracks, or exposed wiring
- Clean the cord with a slightly damp cloth to remove dust and debris
- Allow the cord to dry completely before storage
- Use the vacuum’s cord storage system or loosely coil the cord
When coiling the power cord, avoid tight bends or kinks that can damage the internal wiring. The natural figure-eight wrapping technique reduces internal twisting and prevents stress on the cord’s connection points. Never wrap the cord tightly around the vacuum body, as this creates strain at the connection point and can lead to internal wire breakage.
For vacuums with retractable cords, consider leaving the cord partially extended during storage to reduce spring tension, which can weaken over time if kept under constant stress.
Charging Station Considerations
If your vacuum uses a charging base or docking station, this equipment also requires preparation:
- Disconnect the charging station from power
- Clean the electrical contacts with electronic contact cleaner or a dry cloth
- Remove any accumulated dust from ventilation openings
- Store the charging base in a clean, dry location
The electrical contacts on charging bases are particularly susceptible to dust buildup and oxidation during storage. Cleaning these contacts ensures reliable electrical connection when the vacuum returns to service. For severe oxidation, a specialized electronic contact cleaner can restore connectivity.
Circuit Protection Measures
Internal electronic circuits in modern vacuums benefit from additional protection during storage:
- If accessible, locate and remove any fuses before storage
- For smart vacuums, perform a proper shutdown sequence per manufacturer instructions
- For computerized models, reset to factory defaults before storage
- Remove any WiFi or smart home connection settings
Electronic components are sensitive to humidity and temperature fluctuations. Consider using silica gel packets near circuit boards for models where these components are accessible. These desiccants absorb ambient moisture and protect delicate electronics from humidity-related damage.
Essential Components to Disconnect: Filtration Systems
The filtration system is critical to your vacuum’s performance and should be completely removed, cleaned, and properly stored to prevent contamination and degradation.
HEPA Filter Removal and Storage
High-Efficiency Particulate Air (HEPA) filters are designed to capture microscopic particles and allergens. These specialized filters require particular care:
- Locate and remove all HEPA filters according to manufacturer instructions
- If washable, clean according to specifications and allow to dry completely (typically 24-48 hours)
- If non-washable, tap gently to remove loose debris (never wash non-washable filters)
- Store clean, dry filters in sealed plastic bags to prevent dust contamination
- Label each bag with filter position and orientation information
HEPA filters typically need replacement every 6-12 months during normal use, but proper cleaning and storage can extend their effective lifespan. For non-washable HEPA filters that are still serviceable, storage in sealed containers prevents additional contamination during the storage period.
Some vacuum models use HEPA filters costing $30-50 each, making their proper preservation economically significant. Always check if your specific filter is washable before cleaning, as water can destroy the filtering capabilities of non-washable HEPA materials.
Pre-Motor Filter Maintenance
Pre-motor filters protect the vacuum’s motor from dust infiltration and require thorough attention:
- Remove pre-motor filters according to your vacuum’s design
- Clean washable foam or plastic filters with cool water (no soap) and allow to dry completely
- Replace heavily soiled non-washable filters
- Ensure filters are 100% dry before storage to prevent mold growth
- Store in breathable containers that prevent dust accumulation
The pre-motor filter often accumulates the most debris and moisture during regular operation. Complete drying is essential before storage, with 24-72 hours of air drying recommended depending on filter thickness and material. Storing damp filters can lead to mold growth and motor damage when the vacuum is returned to service.
Post-Motor Filter Care
Post-motor (exhaust) filters ensure clean air output and require similar care to other filters:
- Remove from exhaust area of the vacuum
- Clean according to type (foam, pleated, or carbon)
- For carbon filters, note that they cannot be washed and may need replacement
- Allow all cleaned filters to dry completely
- Store in dust-free containers separate from the vacuum
Post-motor filters often incorporate activated carbon or specialized materials to remove odors and fine particles. Carbon filters cannot be restored once saturated and should be replaced if they’ve been in use for more than 6 months before storage.
Washable vs. Disposable Filter Considerations
Understanding your vacuum’s filter types informs proper storage preparation:
| Filter Type | Pre-Storage Preparation | Storage Container | Replacement Timing |
|---|---|---|---|
| Washable Foam | Wash with water, air dry 24+ hours | Breathable container | When foam shows deterioration |
| Washable HEPA | Rinse with cool water, air dry 48+ hours | Sealed plastic bag | Every 1-2 years depending on use |
| Non-washable HEPA | Tap gently to remove loose debris | Sealed plastic bag | Every 6-12 months of actual use |
| Carbon/Charcoal | Cannot be washed, replace if heavily used | N/A (replace before storage) | After 6 months of regular use |
Storing washable filters while still damp is the most common storage mistake and leads to mold growth and filter deterioration. When in doubt about drying time, add an extra 24 hours to ensure complete moisture evaporation before storage.
Essential Components to Disconnect: Collection Systems
The vacuum’s collection system—whether bag or bagless—requires thorough attention before storage to prevent odors, contamination, and damage.
Dust Container/Bag Removal
For all vacuum types, the collection system must be emptied and separated:
- Remove the dust container or bag according to manufacturer instructions
- For bagless models, empty the dust collection chamber completely
- For bagged models, remove and discard the used bag (never store with a used bag installed)
- Clean all gaskets and sealing surfaces on the dust container
- Leave dust containers open to promote air circulation during storage
Bagless vacuum containers should be thoroughly washed with mild soap and water, then completely dried before storage to prevent mold growth. Pay special attention to the emptying mechanism, as debris often collects around hinges and doors.
For bagged vacuums, installing a fresh bag before storage is debated among experts. Some recommend installing a new bag for dust protection, while others suggest storing without any bag to promote air circulation. The best practice is to store without a bag but keep a new replacement bag with the vacuum for convenience when returning to service.
Emptying and Cleaning Collection Chamber
Proper cleaning of the collection system involves more than simple emptying:
- Disassemble all removable parts of the collection system
- Wash plastic components with mild detergent and warm water
- Use compressed air (if available) to blow out difficult-to-reach areas
- Clean cyclone components in bagless vacuums with special attention
- Allow all parts to dry completely before reassembly
- Leave partially assembled to allow air circulation during storage
Cyclonic separation systems in bagless vacuums contain multiple components that can trap fine dust. These intricate parts require thorough cleaning before storage to prevent dust hardening and system clogging. Some models allow cyclone component removal for cleaning, while others require careful wiping and compressed air cleaning.
Canister Detachment Procedures
For canister and some upright vacuum designs, the main collection unit should be separated from the motor base:
- Release the appropriate latches or locks
- Separate the canister from the motor housing
- Clean all connection points and seals
- Apply a light coating of appropriate lubricant to rubber seals if recommended by manufacturer
- Store components separately but together
The separation points between components often contain rubber gaskets or seals that can become compressed or deformed during storage. Separating these components removes pressure from these seals and extends their functional life. Some manufacturers recommend applying a light coating of silicone lubricant to rubber seals before storage to prevent drying and cracking.
Bin Sensor Cleaning
Modern vacuums often incorporate electronic sensors in the collection system:
- Locate all optical or electronic sensors in the dust container area
- Clean sensors with a dry microfiber cloth or compressed air
- For persistent debris, use a cotton swab lightly dampened with isopropyl alcohol (70%)
- Ensure sensors are completely dry before storage
- Cover sensors with protective tape if they remain exposed during storage
Dust level sensors, automatic bin-full detectors, and dirt recognition systems use optical or electronic components that can become contaminated during normal operation. These sensitive components can provide false readings or fail completely if stored with debris coating their surfaces. Clean sensors ensure proper operation when returning the vacuum to service.
Essential Components to Disconnect: Mechanical Systems
Mechanical components endure physical stress during both operation and storage, making their proper preparation particularly important.
Brush Roll/Beater Bar Removal
The brush roll or beater bar is among the most important mechanical components to remove:
- Access the brush roll according to your vacuum model’s design
- Remove any end caps or retaining clips
- Slide the brush roll out of its housing
- Clean the brush roll thoroughly, removing all hair, string, and debris
- Clean the brush roll housing and bearings
- Store the brush roll separately in a straight position to prevent deformation
Brush rolls contain bearings and bristles that can become permanently deformed if stored improperly. Keeping the brush roll installed during storage can lead to flat spots on the bristles where they contact the floor surface, reducing cleaning effectiveness when returned to use.
Additionally, any hair or string wrapped around the brush roll can harden during storage, making later removal more difficult and potentially damaging bearing assemblies. Complete cleaning before storage prevents these issues.
Belt Disconnection Procedures
Vacuum drive belts require special attention:
- Access the belt compartment according to manufacturer instructions
- Remove the belt from both the motor shaft and brush roll
- Inspect the belt for signs of wear, cracks, or stretching
- Clean the belt with a dry cloth to remove dust and debris
- Store the belt flat in a sealed plastic bag, away from heat and light
- Consider purchasing a replacement belt to have on hand when returning the vacuum to service
Vacuum belts are typically made from rubber or elastomer materials that can degrade over time, especially when under tension. Removing belts during storage prevents the material stretching and deformation that occurs when tension is maintained for extended periods.
The typical vacuum belt costs $5-15 to replace, but the damage a broken belt can cause to the motor or brush roll can be much more expensive. This simple preventive step saves both direct replacement costs and potential consequential damage.
Wheel Maintenance
Vacuum wheels and casters benefit from pre-storage attention:
- Clean all wheels thoroughly, removing hair and debris from axles
- Check wheels for free movement and rotation
- Apply appropriate lubricant to wheel bearings if recommended by manufacturer
- Position the vacuum for storage so weight is not resting on wheels if possible
- For vacuums that must rest on wheels, rotate position periodically during long-term storage
Vacuum wheels develop flat spots when left in one position under pressure for extended periods. These flat spots create noticeable bumps during operation and can permanently deform the wheel material. For unavoidable wheel contact during storage, placing the vacuum on a soft surface helps distribute pressure and prevent deformation.
Height Adjustment Mechanisms
Vacuums with height adjustment features require specific preparation:
- Set the height adjustment to its highest setting before storage
- Clean any debris from the adjustment mechanism
- Apply appropriate lubricant to moving parts if recommended by manufacturer
- Ensure the mechanism moves freely through its full range
- For spring-loaded systems, consider using the middle position to reduce spring tension
Height adjustment mechanisms often use springs that can weaken if kept under compression during storage. Setting the vacuum to its highest position typically reduces tension on these springs, preserving their elasticity and function. For certain models with different adjustment designs, consult the manufacturer’s storage recommendations.
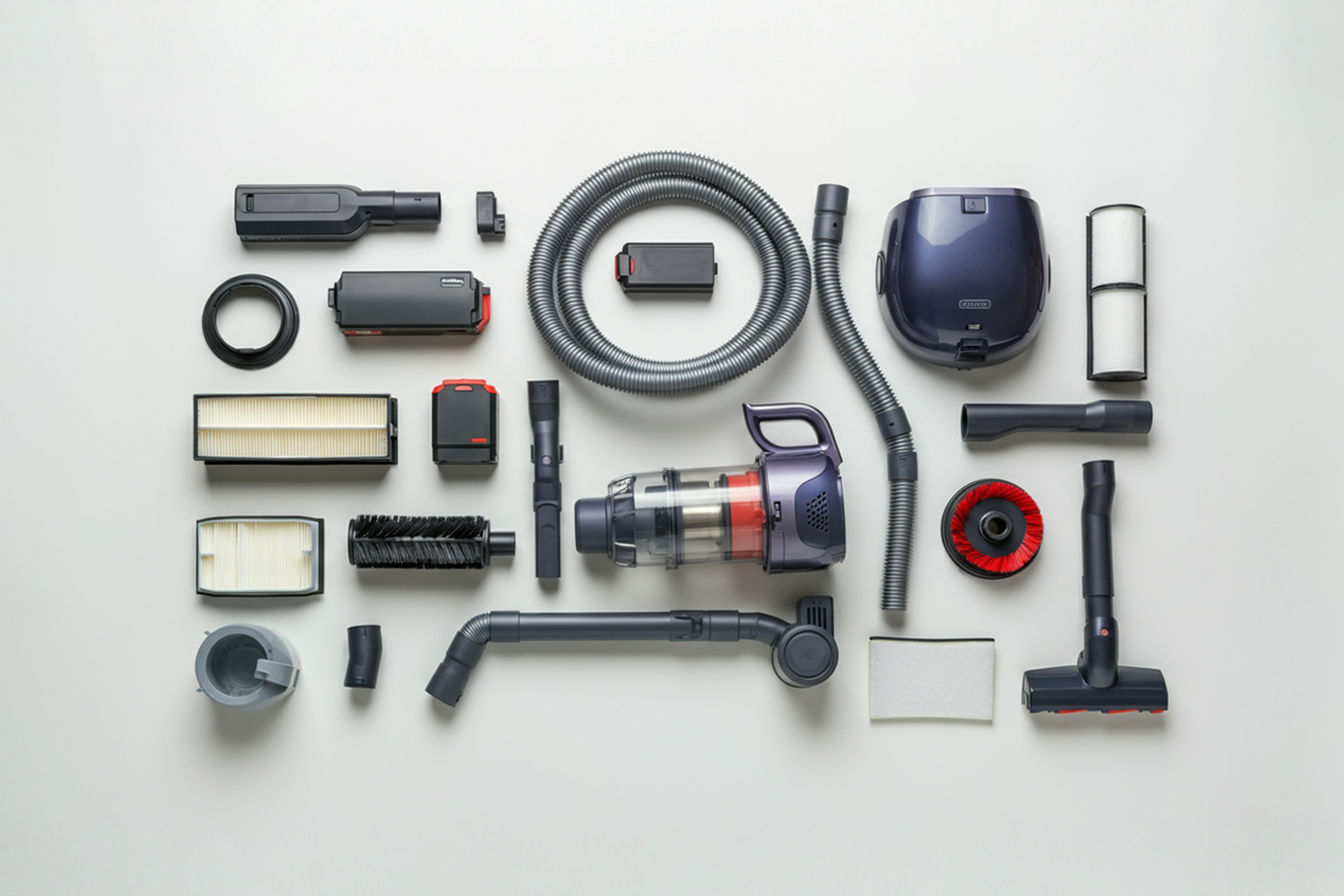
Essential Components to Disconnect: Attachments & Accessories
Vacuum attachments and accessories benefit from proper storage preparation both for their preservation and to prevent damage to the main unit.
Hose Detachment and Storage
The vacuum hose requires specific attention:
- Disconnect the hose from both the vacuum body and any attached wands
- Flush the hose with warm water if the design permits, then allow to dry completely
- For non-washable hoses, use compressed air to blow out debris
- Inspect the hose for cracks, holes, or damage
- Store the hose uncoiled in a straight or gently curved position
- For long hoses, consider using a large-diameter cardboard tube as a storage form
Vacuum hoses develop memory when stored in coiled positions for extended periods. This coil memory can become permanent, making the hose difficult to extend fully during use. Storing the hose in a more natural position prevents this deformation and extends useful life.
Additionally, debris trapped in hose crevices can harden during storage, potentially creating blockages or abrasive surfaces that damage the hose interior. Complete cleaning before storage ensures free airflow when the vacuum returns to service.
Extension Wand Considerations
Extension wands and tubes should be prepared similarly to hoses:
- Disconnect all wands from the vacuum and from each other
- Clean thoroughly, using water for washable components
- Ensure complete drying before storage
- Store wands straight to prevent warping
- For telescoping wands, leave them partially extended to reduce spring tension
Telescoping wands contain internal lock mechanisms and springs that can become compromised when stored fully compressed for long periods. Leaving these wands partially extended during storage preserves the tension mechanisms and prevents internal component binding.
Specialty Tool Maintenance
Specialized attachment tools require individual attention:
- Remove all specialty tools from the vacuum and from each other
- Clean each tool thoroughly, removing hair and debris from brush components
- For motorized attachments, remove batteries if possible
- Check for and remove debris from connection points
- Store tools individually to prevent damage to delicate components
Motorized attachments like mini turbo brushes contain their own mechanical systems that benefit from the same preparation as the main vacuum brush roll. Removing batteries, cleaning brush rolls, and storing in appropriate positions extends attachment life and ensures functionality when returning to service.
Attachment Organization Systems
Properly organizing attachments during storage provides multiple benefits:
- Clean and prepare a storage container specifically for vacuum attachments
- Group similar attachments together
- Wrap cords or delicate components with tissue paper to prevent damage
- Label attachments if necessary, especially for rarely used specialized tools
- Store the container near the vacuum for convenience
An organized attachment storage system not only protects the components but also ensures you can find specific tools when needed. Missing attachments are among the most common vacuum complaints, and proper storage organization prevents this frustration.
Consider using clear plastic containers with dividers, which allow visual identification of attachments while protecting them from dust and damage during storage. Label any attachments with specific use instructions if they’re not self-explanatory.
Storage Environment Considerations
The environment where your vacuum is stored significantly impacts its condition and function when returned to service.
Temperature and Humidity Control
Environmental conditions play a crucial role in proper vacuum storage:
- Ideal storage temperature range: 50-80°F (10-27°C)
- Ideal humidity range: 30-50% relative humidity
- Avoid storage in attics, garages, or basements with extreme temperature variations
- Avoid storage near heat sources like water heaters or furnaces
- Consider using desiccant packets for humid environments
- For very humid regions, consider periodic dehumidifier use in storage areas
Extreme temperatures can damage plastic components, while high humidity promotes mold growth and metal corrosion. Electronic components are particularly vulnerable to humidity damage, with circuit boards potentially developing short circuits from condensation during temperature fluctuations.
For vacuums with LCD displays or advanced electronic systems, temperature stability is even more critical, as extreme cold can damage display components and extreme heat can degrade battery capacity.
Dust Protection Measures
Protecting the vacuum from dust during storage may seem ironic but is essential:
- Cover the prepared vacuum with a breathable cover (cotton sheet or specialized vacuum cover)
- Avoid plastic covers that can trap moisture and promote mold growth
- Ensure all openings where filters were removed are covered with breathable material
- Store in a low-dust environment away from workshop areas or construction
- Consider periodic dusting of the exterior during long-term storage
While protecting from dust, air circulation remains essential to prevent moisture buildup inside the vacuum components. Balancing dust protection with adequate ventilation prevents both contamination and humidity-related damage.
Space Requirements
Proper positioning during storage helps prevent physical damage:
- Provide sufficient space around the vacuum to prevent accidental impacts
- Store in a position that doesn’t compress or stress any remaining components
- For upright vacuums, consider whether standing or laying flat is better for your specific model
- Ensure no heavy items can fall onto the vacuum during storage
- Allow space for periodic inspection during long-term storage
The physical space requirements vary by vacuum type, but all models benefit from storage positions that minimize stress on their structural components. Some manufacturers provide specific orientation recommendations in their manuals.
Orientation and Positioning
The proper storage position depends on vacuum type:
| Vacuum Type | Recommended Storage Position | Rationale |
|---|---|---|
| Upright | Standing upright with handle locked | Prevents stress on handle mechanisms |
| Canister | On its side with hose connection pointing up | Prevents pressure on hose connection port |
| Stick | Disassembled with components laid flat | Prevents stress on connection points |
| Robot | Upside down or on side with brushes uncompressed | Prevents flat spots on wheels and brushes |
| Backpack | Hanging from hook with straps extended | Prevents compression of padding and straps |
For specific models with unique designs, consult the manufacturer’s storage recommendations. Improper orientation can cause warping of plastic components or uneven pressure on mechanical systems, leading to permanent deformation.
Reassembly Guidelines After Storage
Proper reassembly after storage is as important as the storage preparation itself and deserves careful attention.
Component Inspection Before Reassembly
Before reassembling your vacuum:
- Inspect all components for damage, cracking, or degradation
- Check rubber and plastic parts for brittleness or deformation
- Ensure all filters are completely dry and free from mold
- Verify batteries hold a charge if they’ve been stored separately
- Inspect electrical cords for cracks or rodent damage
- Check belt elasticity and condition before reinstallation
This comprehensive inspection identifies any components that require replacement before returning the vacuum to service. Catching damaged components during reassembly prevents operational failures that could cause additional damage to other vacuum systems.
Proper Reconnection Sequence
Reassembly should follow a logical sequence:
- Install fresh or cleaned filters in appropriate locations
- Reconnect mechanical components like brush rolls and belts
- Reassemble and attach the dust collection system
- Connect hoses and wands
- Install fully charged batteries or connect power cord
- Verify all clips, latches, and fasteners are properly secured
Following the correct reassembly order prevents damage to components and ensures all systems function properly. Many vacuum problems after storage result from incorrect reassembly, particularly filter installation errors that can damage motors.
Initial Testing Procedures
Before returning to full service, test the vacuum progressively:
- Perform a brief (5-10 second) power test without contacting any surface
- Check for unusual noises, vibrations, or odors
- Test suction power by picking up a small piece of paper
- Run for 1-2 minutes on different surfaces and settings
- Verify proper function of all attachments and accessories
- Monitor for overheating or performance issues
This gradual testing approach identifies any remaining issues before subjecting the vacuum to full cleaning duties. Progressive testing prevents damage from unidentified problems that could worsen with extended use.
Troubleshooting Common Post-Storage Issues
Be prepared to address these frequent post-storage problems:
| Issue | Possible Cause | Solution |
|---|---|---|
| Weak suction | Improperly installed filters | Verify correct filter placement and seating |
| Burning smell | Dust accumulation on motor | Clean motor housing, replace filters |
| Battery won’t charge | Deep discharge during storage | Replace battery or try recovery charging cycles |
| Brush roll won’t spin | Belt stiffened during storage | Replace belt |
| Unusual noise | Debris in fan or motor | Disassemble and clean affected components |
| Mold smell | Moisture in hose or container | Clean with vinegar solution, dry completely |
Many post-storage issues resolve with simple maintenance procedures. Most problems result from incomplete preparation before storage rather than the storage duration itself.
Special Considerations by Vacuum Type
Different vacuum designs require specific storage approaches beyond the general guidelines above.
Upright Vacuum Specific Guidelines
Upright vacuums benefit from these additional considerations:
- Lock the handle in the upright position to prevent stress on the hinge mechanism
- Remove and clean the headlight lens if equipped
- For models with fold-down handles, store in the folded position
- Place on a flat, level surface rather than hanging
- If the unit must lean against a wall, provide padding at contact points
The weight distribution in upright vacuums can place stress on specific components during storage. Proper positioning distributes this weight evenly, preventing warping or deformation of the vacuum body.
Canister Vacuum Considerations
Canister models require attention to their unique design:
- Detach the power head completely and store separately
- Coil the connecting hose in large, natural loops
- Store on its side rather than resting on wheels or casters
- Protect the hose connection ports with covers if available
- Keep motor vents unobstructed during storage
The extended hose and power cord design of canister vacuums creates additional storage challenges. Proper hose storage prevents kinking and internal damage that can restrict airflow when returned to service.
Stick Vacuum Storage
Modern stick vacuums have specific requirements:
- Disassemble completely, separating the motor unit from the cleaning head
- Remove and properly store the battery at 40-60% charge
- If wall-mountable, consider whether wall storage or flat storage is better long-term
- For models with folding handles, store in the configuration that releases spring tension
- Protect the LCD screen with a microfiber cloth if equipped
The lightweight design of stick vacuums can create pressure points during storage that aren’t immediately obvious. Complete disassembly distributes components for optimal storage and prevents stress on connection points.
Robot Vacuum Preparation
Autonomous vacuum robots need specialized attention:
- Remove and clean all brushes, rollers, and wheels
- Clean sensors thoroughly with microfiber cloth or compressed air
- Remove and properly store the battery at 40-60% charge
- Clean charging contacts on both robot and base station
- Store upside down or on its side to prevent wheel deformation
- Reset software to factory defaults before storage
Robot vacuums contain sophisticated sensor arrays and navigation systems that require protection during storage. Clean sensors ensure proper function when returned to service, preventing navigation errors and cleaning inefficiency.
For models with mapping capabilities, resetting to factory defaults before storage prevents confusion when the robot is reactivated in potentially different environments.
Central Vacuum System Maintenance
Built-in central vacuum systems require different preparation:
- Empty the main collection canister completely
- Clean or replace the main filter system
- Run the system for 30 seconds with no hose attached to clear the pipes
- Seal all wall inlets with covers to prevent dust infiltration
- Power down the main unit completely
- For long-term disuse, consider professional inspection before returning to service
Central vacuum systems benefit from having much of their infrastructure protected within walls, but inlet valves and collection systems require specific protection to prevent pest infiltration and dust contamination during periods of disuse.
Manufacturer Recommendations
While general guidelines apply to most vacuums, manufacturer-specific advice should take precedence.
Common Brand-Specific Guidelines
Major manufacturers often provide model-specific storage instructions:
- Dyson: Recommends complete filter cleaning and drying (24+ hours air drying) before storage
- Shark: Advises storing batteries separately and emptying all dust cups completely
- Miele: Suggests installing a fresh bag before storage to protect internal components
- Bissell: Recommends removing and cleaning solution tanks for carpet cleaners
- Hoover: Provides specific brush roll removal instructions that vary by model
When manufacturer recommendations conflict with general guidelines, follow the brand-specific instructions for your model. These tailored recommendations address design peculiarities that may not be covered by general advice.
Warranty Considerations
Storage practices can impact warranty coverage:
- Check warranty terms regarding long-term storage requirements
- Document your storage preparation procedure with photos if warranty concerns exist
- Some manufacturers void warranties if batteries are not maintained according to specifications
- Professional cleaning before storage may be required for some commercial models
- Certain premium brands offer storage preparation services
Many manufacturers specify maintenance requirements that, if not followed, can void warranty coverage. Proper documentation of storage preparation provides evidence of appropriate care if warranty claims become necessary after storage.
Documentation and Manual Storage
Proper document management supports future maintenance:
- Locate the original vacuum manual and quick start guide
- Store documentation in a sealed plastic bag with the vacuum
- Include any warranty information and purchase receipts
- Consider creating a maintenance log noting storage date and procedures performed
- Add a note with battery maintenance reminders if applicable
Complete documentation facilitates proper reassembly and operation when returning the vacuum to service. The maintenance log provides valuable reference information for troubleshooting if problems develop after storage.
Authorized Service Provider Considerations
For high-end or commercial vacuums, professional service before storage may provide significant benefits:
- Professional cleaning reaches internal components not accessible to typical users
- Technicians can identify and replace worn components before they fail during storage
- Specialized equipment can dry components more thoroughly than air drying
- Service providers may offer storage preparation packages specifically designed for long-term disuse
- Documentation of professional service may preserve warranty coverage
While not necessary for all vacuum models, professional servicing provides comprehensive preparation for premium equipment worth several hundred dollars. The service cost typically ranges from $50-150 depending on vacuum type and service level, representing good value protection for high-end investments.
Maintenance Schedule During Storage
Even properly prepared vacuums benefit from periodic attention during long-term storage.
Periodic Inspection Recommendations
Regular checks prevent unexpected issues:
- Inspect the vacuum visually every 3-4 months during storage
- Check for pest intrusion, dust accumulation, or environmental damage
- Verify storage conditions remain appropriate (temperature, humidity)
- Ensure no items have been placed on or against the vacuum
- Look for signs of moisture accumulation or mold development
These periodic inspections identify developing problems before they cause permanent damage. Early intervention prevents minor issues from becoming major repairs, particularly for electronic components where moisture exposure can cause progressive corrosion.
Component Rotation Practices
Some components benefit from periodic movement during storage:
- Rotate wheels or reposition the vacuum slightly every 3-4 months
- For stored batteries, perform a partial discharge/recharge cycle every 6 months
- Operate mechanical switches and buttons occasionally to prevent sticking
- Extend and retract telescoping wands to prevent mechanism seizure
- Flex hoses gently to maintain material pliability
These minimal activities maintain component functionality during extended storage. Moving parts benefit from occasional operation that prevents lubricant hardening and surface adhesion between components.
Dust Removal Procedures
Even properly covered vacuums accumulate some dust during storage:
- Remove the storage cover carefully to prevent dust redistribution
- Use compressed air or a separate vacuum to remove accumulated dust
- Pay special attention to cooling vents and openings
- Clean electronic displays and control panels with appropriate methods
- Replace the storage cover, ensuring proper positioning
Regular dust removal prevents particulate infiltration into sensitive components. Dust can become conductive when combined with humidity, potentially causing electronic failures in sophisticated vacuum models.
Testing Recommendations
Periodic functional testing identifies developing issues:
- For very long storage (1+ years), consider brief operational tests every 6-12 months
- Install batteries and filters temporarily for testing, then remove for continued storage
- Run the vacuum for 1-2 minutes to verify motor function
- Check electronic displays and control functions
- Return to proper storage configuration after testing
These brief operational tests verify system integrity during extended storage. Early identification of developing problems allows for intervention before permanent damage occurs, particularly for motor and electronic components.
Conclusion
Proper component separation and storage preparation represents a small investment of time that yields significant returns in vacuum longevity and performance reliability. By systematically addressing each vacuum system—electrical, filtration, collection, mechanical, and accessories—you create optimal conditions for long-term storage that prevents damage and degradation.
The specific procedures outlined in this guide apply to most vacuum models, but always defer to manufacturer recommendations when available. Different vacuum designs present unique storage challenges, and brand-specific guidelines address these design variations more precisely than general recommendations.
Remember that the goal of component separation is to relieve mechanical stress, prevent contamination, and create conditions that preserve materials and functionality during periods of disuse. When done properly, a vacuum can emerge from years of storage in nearly the same condition as when it was prepared, ready to provide reliable cleaning performance immediately.
Final Storage Preparation Checklist
Use this comprehensive checklist to ensure you’ve addressed all critical aspects of vacuum storage preparation:
Electrical Systems
- [ ] Batteries removed and properly stored at 40-60% charge
- [ ] Power cord properly coiled without stress points
- [ ] Charging bases cleaned and stored appropriately
- [ ] Electronic components protected from humidity
Filtration Systems
- [ ] All filters removed, cleaned, and completely dried
- [ ] Filter positions documented for correct reassembly
- [ ] Filter housings cleaned and inspected
- [ ] Replacement filters acquired if needed
Collection Systems
- [ ] Dust containers emptied and thoroughly cleaned
- [ ] Bags removed and disposal bag installed or port covered
- [ ] Cyclone components cleaned and dried
- [ ] Bin sensors cleaned and protected
Mechanical Systems
- [ ] Brush rolls removed, cleaned, and stored separately
- [ ] Belts removed to prevent stretching
- [ ] Wheels cleaned and positioned to prevent flat spots
- [ ] Height adjustment mechanisms set to minimize tension
Attachments & Accessories
- [ ] Hoses detached and stored in natural position
- [ ] Extension wands cleaned and stored straight
- [ ] Specialty tools cleaned and organized
- [ ] Attachment storage container prepared and labeled
Storage Environment
- [ ] Temperature-controlled location identified (50-80°F)
- [ ] Humidity-controlled space secured (30-50%)
- [ ] Breathable cover positioned correctly
- [ ] Adequate space provided for periodic inspection
Documentation
- [ ] Manual and warranty information stored with vacuum
- [ ] Maintenance log created with storage date
- [ ] Battery maintenance schedule noted
- [ ] Reassembly instructions included if complex
By following these guidelines and addressing the specific needs of your vacuum model, you’ll ensure your cleaning equipment remains in optimal condition throughout storage, ready to provide effective cleaning performance when returned to service.
Whether storing a vacuum for a season, during a move, or as a backup unit, these component separation practices represent the best approach to preserving your investment and extending the useful life of your cleaning equipment.