Making Room for Clean: The Ultimate Guide to Hidden Vacuum Cleaner Storage
Discover innovative ways to hide vacuum cleaners in existing spaces. This guide reveals how to transform under-stair areas and cabinets into perfect storage solutions you never knew your home had.
This post may contain affiliate links. If you make a purchase through these links, we may earn a commission at no additional cost to you.
In the battle for household space, vacuum cleaners often emerge as bulky adversaries. These essential cleaning tools, while indispensable for maintaining a tidy home, frequently become unsightly obstacles leaning against walls or crammed into already overcrowded closets. The quest for convenient yet concealed vacuum storage represents a common challenge for homeowners and apartment dwellers alike.
This comprehensive guide explores the untapped potential of existing spaces in your home—specifically under-stair areas and cabinets—that can be transformed into perfect hideaways for your vacuum cleaner and accessories. By integrating vacuum storage into these often overlooked areas, you can simultaneously declutter your living space and ensure your cleaning equipment remains readily accessible when needed.
Whether you’re dealing with a compact stick vacuum or a full-sized upright model, the solutions ahead will help you reclaim valuable space while keeping your cleaning arsenal organized and at the ready. Let’s explore how thoughtful design and simple modifications can turn those awkward spaces into functional storage that enhances both the efficiency and aesthetics of your home.
Why Hidden Vacuum Storage Matters
The importance of dedicated vacuum storage extends beyond mere aesthetics, though that alone provides significant motivation. A vacuum cleaner propped in a corner or visible in an open closet creates visual disruption in an otherwise well-designed room. This visual clutter affects the perceived spaciousness of your home and diminishes the impact of your interior design efforts.
Space efficiency represents another critical consideration, particularly in smaller homes or apartments where every square foot counts. Traditional storage solutions often waste valuable space, forcing compromises between accessibility and organization. Strategic vacuum integration makes use of otherwise overlooked spaces, effectively expanding your usable square footage.
Accessibility factors heavily into successful cleaning routines. When your vacuum requires an archaeological expedition to unearth, cleaning sessions become less frequent and more frustrating. Proper storage ensures your vacuum remains easily accessible while staying out of sight when not in use—striking the perfect balance between convenience and aesthetics.
Equipment protection provides yet another compelling reason for dedicated storage. Vacuum cleaners represent a significant household investment. Proper storage prevents accidental damage, keeps cords from being crimped or tangled, and protects attachments from being lost or broken. This protection directly translates to extended vacuum lifespan and better cleaning performance over time.
Assessing Your Available Spaces
Before embarking on any storage project, a thorough assessment of potential spaces helps identify the most viable options for your specific home and vacuum type. This evaluation should consider both the physical dimensions and practical accessibility of potential storage locations.
When examining under-stair possibilities, look beyond the obvious triangular space at the bottom of staircases. Consider the full run of the stairs, which might accommodate recessed storage niches or pull-out drawers at various points. Even enclosed staircases often contain unused cavities behind drywall that could be converted to storage with modest construction effort.
For cabinet conversion opportunities, examine kitchen toe kicks, oversized cabinets, or underutilized corner cabinets that frequently waste space with awkward configurations. Pantries, utility closets, and entryway storage units frequently contain vertical space that could accommodate a vacuum with simple interior modifications.
Accurate measurement proves essential for successful integration. Measure your vacuum’s height, width, and depth, paying special attention to handle height and any protruding elements. Include additional clearance for easy insertion and removal—typically 1-2 inches on all sides. For cordless models, factor in charging requirements and potential dock installations.
Accessibility requirements vary based on frequency of use and user mobility. Consider whether the storage location allows for convenient removal without awkward bending or lifting. The ideal storage solution balances concealment with ease of access, ensuring cleaning tools remain readily available when needed without dominating your visual space when not in use.
Under-Stair Vacuum Storage Solutions
The space beneath staircases represents one of the most underutilized areas in many homes, offering exceptional potential for vacuum storage integration. These spaces vary considerably based on staircase design, but most provide ample room for creative storage solutions.
Enclosed staircases typically offer the greatest potential, with substantial concealed space behind stair walls. This area can be accessed by creating a hinged panel or pull-out drawer system sized specifically for your vacuum. Open-tread staircases provide less hidden space but might accommodate recessed storage compartments between structural supports.
Design considerations should include both structural integrity and practical functionality. Ensure modifications don’t compromise stair safety or stability by avoiding cuts into load-bearing elements. Consider installing a shallow drawer system that pulls out perpendicular to the staircase, maximizing the usable depth while maintaining accessibility.
Creating effective under-stair storage typically follows this approach:
- Carefully measure both the available space and your vacuum dimensions
- Plan access points that maximize usable space while fitting your home’s aesthetic
- Frame out the storage area using appropriate lumber
- Install sliding hardware or hinges based on your chosen access method
- Finish with panels matching surrounding finishes for seamless integration
- Add interior features like hooks for attachments or charging stations
Electrical considerations prove particularly important for rechargeable or robot vacuums. Installing a dedicated outlet inside your storage space eliminates unsightly cords and creates a complete charging station. Always consult qualified electricians for such modifications to ensure compliance with local building codes and safety standards.
Cabinet Integration for Vacuum Storage
Existing cabinets present excellent opportunities for vacuum storage with relatively minor modifications. Their standardized dimensions and established locations throughout the home make them ideal candidates for creative repurposing.
Kitchen cabinets often provide the most immediate opportunities, particularly tall pantry cabinets or those adjacent to refrigerators. Bathroom vanities with sufficient depth might accommodate smaller handheld or stick vacuums. Hallway or entryway storage cabinets, being conveniently located for whole-house cleaning, offer particularly practical conversion options.
The most straightforward cabinet conversion involves removing fixed shelving and installing a simple hook system for hanging stick vacuums. More elaborate modifications might include installing pull-out trays on heavy-duty slides to support heavier upright models. For the seamless appearance, consider replacing a standard door with a custom-sized panel that integrates visually with surrounding cabinetry.
Ventilation deserves special attention when adapting cabinets for vacuum storage. Recently used machines may require cooling time and proper airflow to prevent odor buildup or component damage. Simple vent cutouts in inconspicuous locations or small cabinet fans provide effective solutions for this requirement.
Charging stations integrate particularly well with cabinet storage. A small hole drilled through the cabinet back allows cord passage while keeping chargers concealed. For frequently used cordless models, consider mounting the charging dock inside the cabinet at an accessible height to facilitate quick return and reliable charging between uses.
DIY Hidden Vacuum Storage Projects
Creating custom vacuum storage need not require professional woodworking skills or expensive materials. Several approachable DIY projects can transform existing spaces with basic tools and readily available supplies.
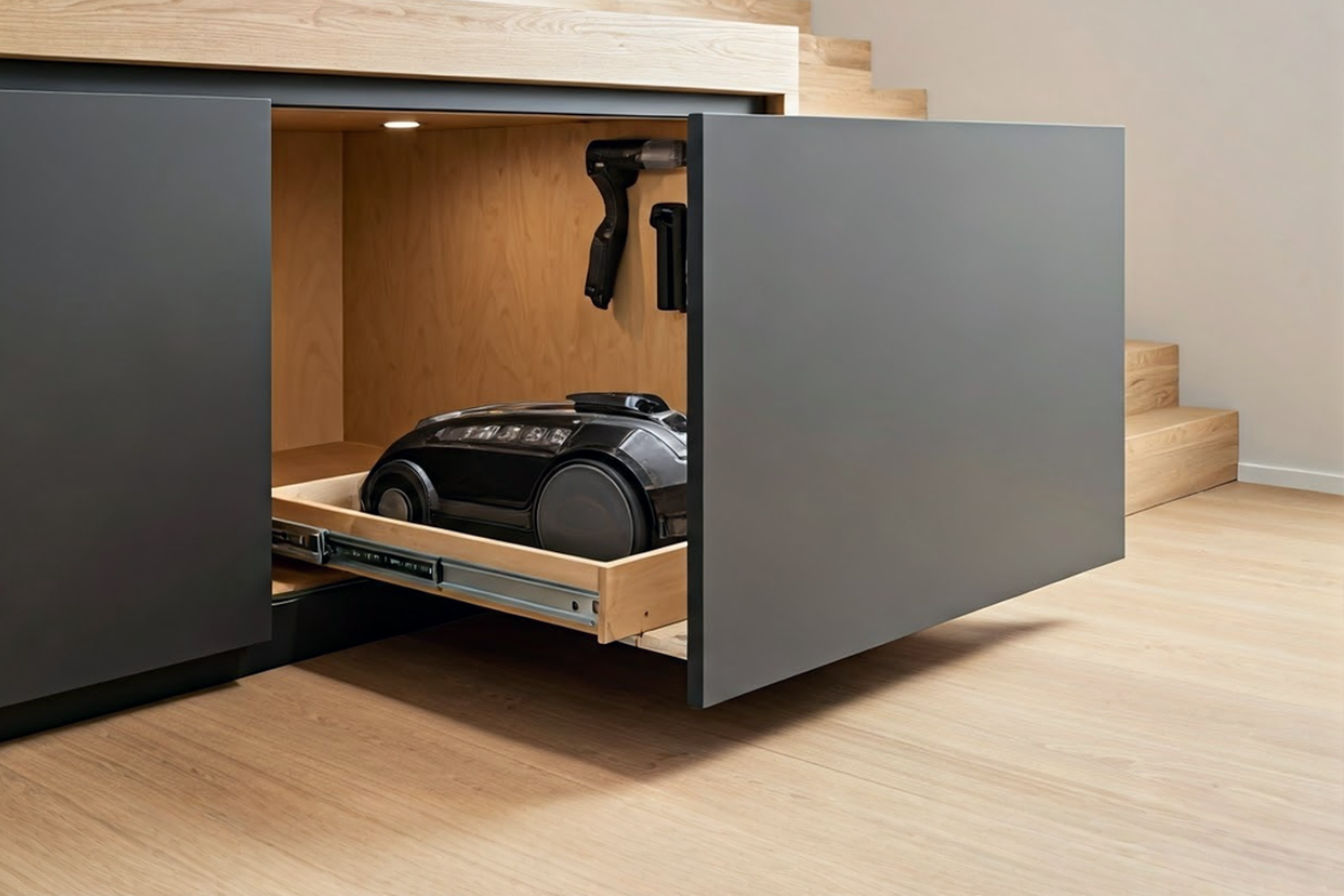
A pull-out vacuum drawer represents one of the most versatile solutions. This project typically uses drawer slides rated for 75-100 pounds mounted to a simple plywood base. The drawer component slides forward for easy access and retracts completely from view when not needed. This approach works exceptionally well in toe kick spaces beneath kitchen cabinets or within the lower section of pantry cabinets.
Vertical slot storage provides an ideal solution for modern stick vacuums. Creating a narrow vertical compartment with a simple bracket system accommodates these sleek cleaning tools without wasting space. This configuration works particularly well in narrow cabinet sections, between appliances, or in purpose-built wall niches in utility areas.
A hidden-panel approach converts existing closets or built-ins by replacing a standard door with a panel designed to match surrounding finishes. This camouflaged access point preserves the visual continuity of your space while concealing storage behind. The interior organization can be customized with hooks, shelves, or brackets specific to your vacuum model and accessories.
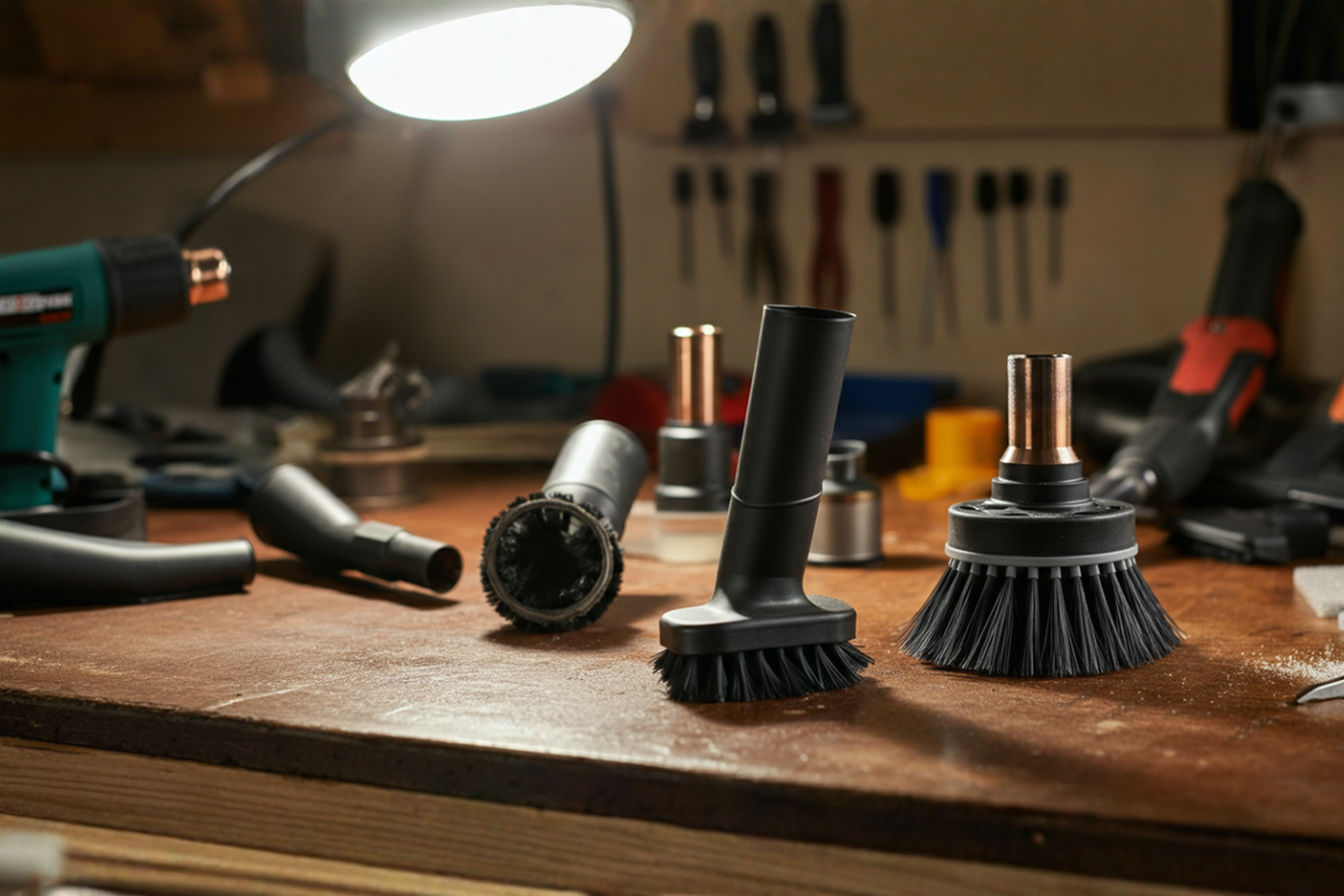
Attachment organization enhances any vacuum storage solution. Simple hook systems, small bins, or dedicated wall mounts keep tools organized and accessible. Consider creating specific homes for each attachment, perhaps with silhouette labels, to ensure everything returns to its proper place and remains ready for the next cleaning session.
Optimizing Storage for Different Vacuum Types
Different vacuum designs require tailored storage approaches to maximize both space efficiency and accessibility. Understanding the specific characteristics of your vacuum type allows for more effective integration into your home’s existing spaces.
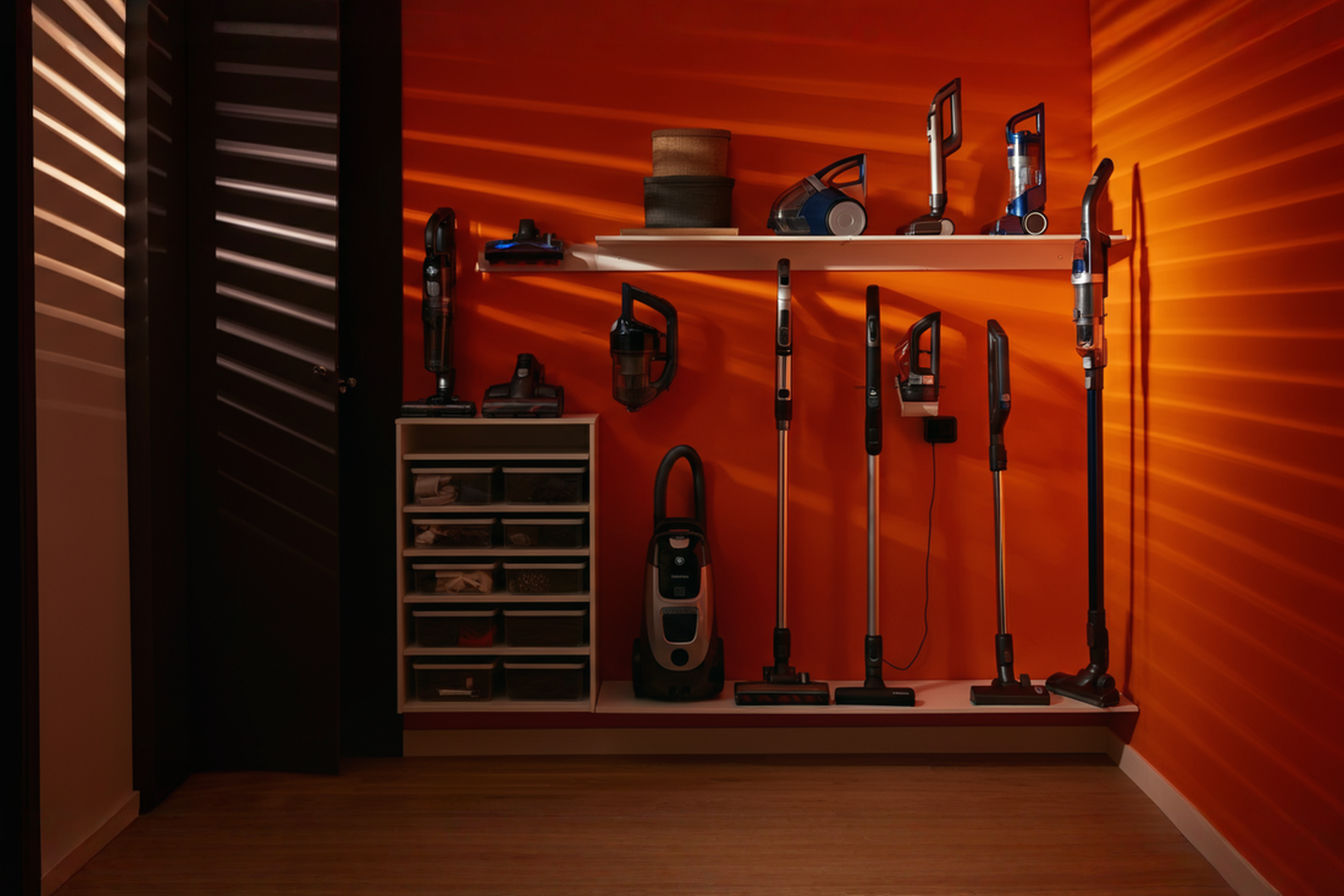
Upright vacuum models present particular storage challenges due to their height and sometimes awkward proportions. These machines store most efficiently in tall, narrow spaces with sufficient depth to accommodate their footprint. Under-stair closets with vertical access or tall kitchen cabinets provide ideal homes for these larger machines. Consider installing a simple turntable base to facilitate easier removal from deep storage spaces.
Canister vacuums, with their separated components, benefit from storage that keeps hoses neatly coiled and attachments organized. A shallow drawer beneath the main storage area provides an ideal solution for hoses and smaller parts. Alternatively, wall-mounted hose holders inside cabinet doors prevent tangling while maximizing space efficiency.
Robot vacuum integration has become increasingly important as these devices gain popularity. Their charging docks require consistent positioning and electrical access. Consider creating a dedicated garage-style cubby that allows the robot to dock itself after cleaning while remaining concealed behind a simple door or panel.
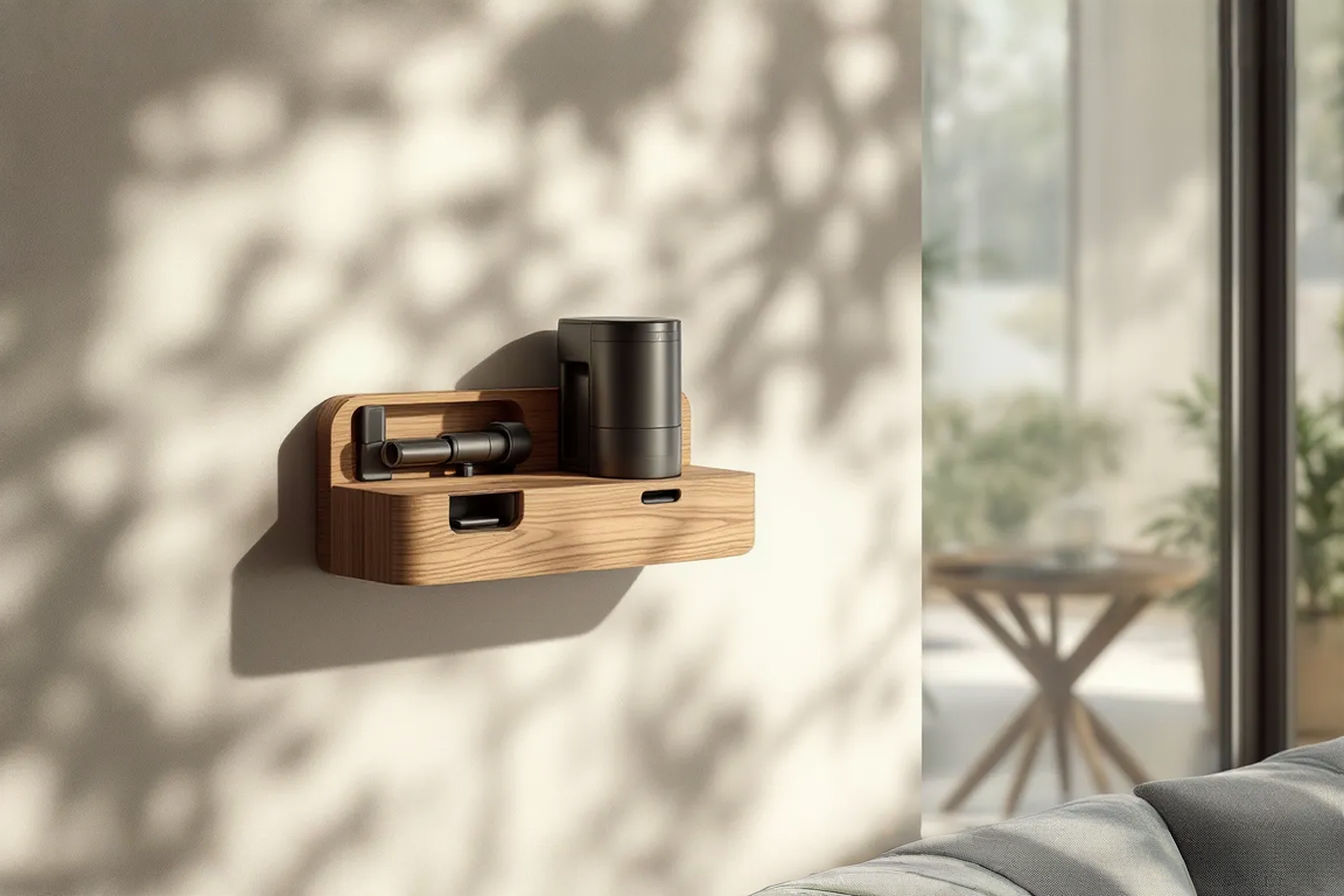
Stick and cordless vacuums, with their charging requirements and slender profiles, lend themselves to vertical storage solutions. Wall-mounted brackets inside cabinets or closets keep these tools accessible while their chargers remain connected. Their lightweight design allows for higher placement in storage areas, taking advantage of otherwise unused vertical space.
Handheld vacuums benefit from quick-access storage near areas requiring frequent spot cleaning. Consider incorporating small dedicated compartments in kitchen islands, mudroom cabinets, or bathroom vanities. Their compact size allows for creative integration into spaces too small for larger cleaning tools.
Materials and Hardware for Vacuum Storage Projects
Selecting appropriate materials and hardware ensures your vacuum storage solution provides durable performance while complementing your home’s aesthetic. These choices significantly impact both the functionality and visual integration of your storage design.
For structural components, 3/4-inch plywood offers an ideal balance of strength and workability. Cabinet-grade plywood provides a smooth finish for painted surfaces, while hardwood plywood offers attractive grain patterns for stained applications. For areas supporting significant weight, consider additional reinforcement with solid lumber or metal bracing.
Sliding hardware selection dramatically affects the ease of use and durability of pull-out storage. Ball-bearing drawer slides rated for 75-100 pounds provide smooth operation even for heavier vacuums. Full-extension slides allow complete access to the storage space, facilitating easier removal and return of cleaning equipment.
Door and access panel design influences both functionality and visual integration. For seamless appearance, consider using cabinet doors matching your existing cabinetry or creating custom panels from material matching surrounding finishes. Soft-close hinges prevent slamming and reduce wear over time. Touch-latch mechanisms eliminate the need for visible handles, further enhancing the hidden nature of your storage.
Ventilation components become important for storage of recently used equipment. Simple metal or plastic vent covers can be installed in inconspicuous locations to allow airflow while maintaining an attractive appearance. For more active ventilation, small USB-powered fans provide effective air circulation in enclosed storage areas.
Interior organization accessories complete your storage system. Consider vinyl-coated hooks for hanging accessories, removable bins for smaller components, and velcro straps for cord management. These modest additions dramatically improve the functionality of your storage solution while preventing damage to equipment and accessories.
Professional Solutions vs. DIY Approaches
The decision between professional installation and DIY implementation depends on your specific circumstances, skills, and budget. Both approaches offer distinct advantages worth considering before embarking on your vacuum storage project.
Custom cabinetry provides the most seamless integration, with finishes and details precisely matching your existing décor. This professional approach typically costs between $400-1,200 depending on complexity and materials, but delivers exceptional visual integration and durability. This option proves particularly valuable in high-visibility areas where aesthetic considerations outweigh budget constraints.
DIY projects typically range from $75-300 in materials, representing significant savings for homeowners with basic construction skills. Simple modifications to existing cabinets might require only a few hours of work, while more complex under-stair conversions might extend to weekend projects. The hands-on approach allows for customization to your specific equipment and space requirements.
The market offers several pre-manufactured solutions worth considering. Pull-out cabinet organizers designed for cleaning supplies ($50-150) can be adapted for vacuum storage with minimal modification. Specialized vacuum cabinets ($200-500) provide ready-made solutions for standard-sized equipment but may require more space than custom alternatives.
Semi-custom options bridge the gap between DIY and professional installations. Cabinet companies often provide modifiable storage components that can be adapted for vacuum storage. These systems typically install into existing spaces, requiring less skill than complete custom construction while providing more finished results than pure DIY approaches.
Installation Tips and Tricks
Successful implementation of your vacuum storage solution relies on thoughtful planning and careful execution. These practical considerations help ensure your project proceeds smoothly and delivers satisfactory results.
Essential tools for most vacuum storage projects include a drill with various bits, a circular saw or jigsaw for cutting panels, a stud finder for locating wall supports, a level to ensure proper alignment, and basic measuring tools. For more elaborate projects, a pocket hole jig facilitates strong, hidden joinery, while a router allows for more finished edge treatments on visible components.
Safety considerations should include proper electrical planning for any charging components. Always shut off power at the breaker before adding or modifying outlets. Consider consulting an electrician for installations requiring new wiring. When cutting into walls, verify the absence of plumbing or electrical lines before proceeding.
Mock-up testing saves considerable frustration by validating designs before final construction. Create temporary cardboard templates of your vacuum and storage space to verify proper fit and clearance. Test the proposed motion of doors or drawers to ensure unrestricted operation. This preliminary step identifies potential issues before investing in materials or making irreversible cuts.
Weight considerations become particularly important for wall-mounted or pull-out systems. Ensure mounted components connect securely to wall studs or solid blocking, not just drywall. For sliding systems, verify that hardware load ratings substantially exceed your vacuum’s weight plus any accessories. This margin accommodates the additional forces created during extraction and return movements.
Maintenance and Accessibility Considerations
The ultimate success of your vacuum storage solution depends not just on initial implementation but on ongoing functionality. These factors ensure your storage remains practical and accessible throughout years of regular use.
Accessibility design should consider the specific needs and physical capabilities of household members. Storage heights should allow comfortable access without excessive bending or reaching. Pull-out mechanisms should operate smoothly with reasonable force requirements. These ergonomic considerations ensure your storage solution enhances rather than hinders regular cleaning routines.
Quick return functionality significantly impacts whether your storage solution remains useful long-term. The easier it is to return the vacuum after use, the more likely it remains properly stored rather than left out. Consider the natural flow from commonly cleaned areas to the storage location, minimizing the effort required to return equipment after cleaning sessions.
Cord management presents an ongoing challenge for corded vacuum models. Simple cord hooks or retractable cord systems prevent tangling and damage. For cordless models, integrated charging ensures batteries remain ready for use while keeping charging components concealed and protected.
Complementary cleaning supply storage enhances the functionality of your vacuum system. Consider incorporating additional space for related items like dust cloths, spare bags, or cleaning solutions. This comprehensive approach creates a complete cleaning center rather than just vacuum storage, further increasing the practical value of your installation.
Styling and Design Elements
The aesthetic integration of your vacuum storage solution plays a crucial role in its success, particularly in visible areas of your home. Thoughtful design elements ensure your storage enhances rather than detracts from your interior design.
Seamless blending requires careful matching of materials, colors, and design elements with surrounding areas. For under-stair installations, match panel designs and trim details to existing stair components. In kitchen areas, cabinet door styles and hardware should coordinate with adjacent cabinetry. This attention to detail helps vacuum storage disappear into your existing décor.
Hardware selection significantly impacts both function and appearance. In highly visible areas, consider concealed hinges and touch-latch mechanisms that eliminate visible hardware. Where handles are necessary, choose styles complementing your existing design scheme. Quality hardware ensures reliable operation while enhancing the finished appearance of your installation.
Multi-purpose approaches maximize the value of your storage project. Consider incorporating additional storage for related items or creating surfaces that serve secondary functions. For example, a vacuum cabinet in an entryway might include a bench seating element above, while kitchen vacuum storage might incorporate a pull-out step stool function for reaching high cabinets.
Lighting elements, while optional, considerably enhance usability and sophistication. Simple battery-operated motion-sensing lights illuminate cabinet interiors when accessed. For more elaborate installations, LED strip lighting connected to door switches creates automatic illumination when storage is opened, ensuring visibility of all components.
Conclusion
The integration of vacuum storage into under-stair spaces and existing cabinets represents a perfect marriage of practicality and design consciousness. By reclaiming these often overlooked areas, you simultaneously solve the persistent challenge of vacuum storage while maximizing your home’s usable space.
The approaches outlined in this guide offer solutions scalable to various home sizes, design preferences, and vacuum types. Whether implementing a simple cabinet conversion or creating elaborate under-stair storage, the fundamental principles remain consistent: measure carefully, plan thoroughly, and prioritize both accessibility and visual integration.
Beyond the immediate benefit of finding a proper home for your vacuum cleaner, these projects contribute to a more organized, efficient living environment. The thoughtful integration of cleaning tools encourages more regular maintenance while eliminating the visual distraction of exposed equipment.
As living spaces continue to prioritize dual functionality and clever space utilization, hidden vacuum storage stands as a practical example of how thoughtful design can solve everyday challenges. By implementing these storage solutions, you transform mundane storage problems into opportunities for enhancing both the function and beauty of your home.