Dusting Tool Integration: Extending Your Vacuum’s Reach to All Surfaces
Discover how the right vacuum attachments can help you clean places you never thought possible. From ceiling fans to delicate collectibles, your vacuum can reach it all.
This post may contain affiliate links. If you make a purchase through these links, we may earn a commission at no additional cost to you.
Dust has a sneaky way of settling in the most difficult spots in our homes. That thin layer on top of the ceiling fan, the stubborn particles clinging to crown molding, or the dust bunnies hiding behind heavy furniture – these challenges can make cleaning feel like a never-ending battle. But what if you could reach all these spots without climbing on wobbly chairs or straining your back? That’s where vacuum dusting tools come in. By adding the right attachments to your vacuum cleaner, you can transform it into a dust-fighting superhero that reaches places you never thought possible.
Understanding Vacuum Dusting Tools
Your vacuum likely came with a few basic attachments, but many people don’t fully understand their purpose or how to use them effectively. Let’s demystify these helpful dust-busting tools.
Common Types of Dusting Attachments
Crevice tools feature a long, flat design with a narrow opening. These slim attachments slide into tight spaces between furniture, along baseboards, and into corners where dust loves to hide.
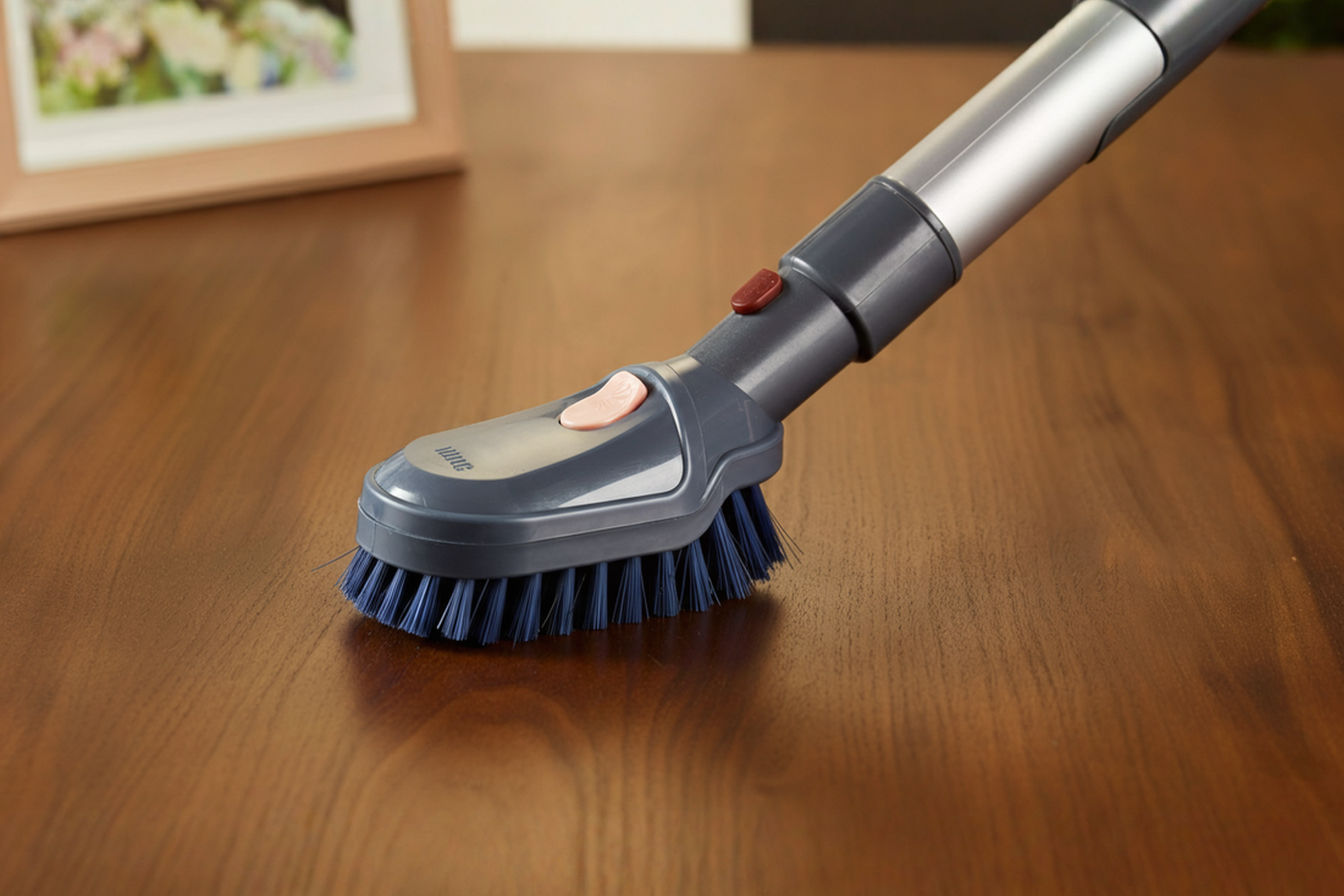
Dusting brushes have soft bristles that gently remove dust from delicate surfaces. The bristles help prevent scratches while the suction pulls dust away from surfaces like blinds, lampshades, and picture frames.
Extension wands add extra length to your vacuum’s reach. These straight tubes connect between your vacuum’s handle and the attachment, helping you clean high ceilings and other elevated surfaces without a ladder.
Soft brush attachments work on more delicate surfaces where scratching is a concern. These attachments combine gentle bristles with effective suction for items like electronics, books, and fragile collectibles.
Upholstery tools typically have a wider mouth and sometimes include a lint-catching fabric strip. They’re perfect for furniture, mattresses, and fabric surfaces where dust and allergens become trapped.
Materials Matter
The materials used in dusting tools affect both cleaning power and surface safety. Most quality attachments use:
Nylon bristles that create static electricity to attract dust while being gentle enough for most surfaces.
Microfiber coverings that trap even the smallest dust particles through electrostatic attraction.
Rubber components that help pick up pet hair through friction, especially useful on upholstery.
Plastic or metal extensions that provide durability while keeping the attachment lightweight.
The best dusting tools balance effective dust removal with surface protection. Cheaper tools often use harder plastics that might scratch delicate items, while premium attachments use materials specifically designed for each surface type.
Attachment Compatibility
Not all attachments work with every vacuum model. Most modern vacuums use a standard-sized connection port, but older or specialty models might require brand-specific attachments.
Standard-size attachments (usually 32mm or 35mm in diameter) fit most vacuum brands and models.
Brand-specific attachments are designed exclusively for certain vacuum models and often offer better fit and functionality.
Universal adapters can help connect non-standard attachments to your vacuum, expanding your cleaning options beyond what your vacuum manufacturer offers.
Before purchasing new attachments, check your vacuum’s user manual to confirm the connection size and whether it accepts universal attachments.
Benefits of Integrating Dusting Tools with Your Vacuum
Adding specialized dusting tools to your cleaning arsenal offers several important advantages over traditional dusting methods.
Improved Air Quality
When you dust with a cloth or feather duster, you’re often just moving dust around rather than removing it. The particles float in the air, only to settle again later. Vacuum dusting tools capture dust directly into your vacuum’s filtration system, keeping it out of the air and out of your lungs.
This capture-and-contain approach is especially helpful for people with allergies or asthma. By removing dust rather than redistributing it, you’re creating a healthier home environment with fewer airborne allergens.
Time-Saving Convenience
A properly equipped vacuum lets you dust and vacuum in a single step. Instead of first dusting surfaces (sending particles into the air and onto the floor) and then vacuuming those fallen particles, you’re completing both tasks simultaneously.
This two-in-one approach cuts your cleaning time significantly. What once might have been a multi-hour process can often be completed in half the time with the right vacuum attachments.
Extended Reach Without Ladders
One of the biggest benefits of dusting tool integration is safety. With extension wands and specialized attachments, you can clean high surfaces while keeping both feet firmly on the ground.
Ceiling fans, top shelves, crown molding, and light fixtures become accessible without balancing on chairs or climbing ladders. This reduces fall risks while still allowing you to maintain a thoroughly clean home.
Multi-Surface Versatility
Modern vacuum attachment sets allow you to move from dusting delicate electronic equipment to cleaning sturdy baseboards without changing tools. This versatility means you can clean more of your home with fewer interruptions.
With the right attachment collection, a single vacuum cleaner can effectively clean:
- Hard surfaces like wood and tile
- Soft surfaces like curtains and upholstery
- Electronic equipment
- Ceiling fixtures and fans
- Window blinds and tracks
- Baseboards and crown molding
- Picture frames and shelving
Choosing the Right Dusting Tools for Your Needs
Not all homes have the same dusting challenges. A ranch-style home with standard ceilings has different needs than a house with cathedral ceilings and ceiling fans. Here’s how to assess what tools will work best for your specific situation.
Assess Your Home’s Dusting Challenges
Start by identifying the hard-to-reach places in your home that collect dust. Do you have:
- High ceilings with crown molding?
- Ceiling fans or hanging light fixtures?
- Tall bookshelves or cabinet tops?
- Electronics that collect dust but need gentle cleaning?
- Blinds or shutters that trap dust?
- Radiators or heating vents with dust-collecting crevices?
Make a list of these challenging areas. This inventory will help you identify which specialized attachments would be most useful for your home.
Brand-Specific vs. Universal Attachments
Brand-specific attachments are designed exclusively for certain vacuum models and often create the best seal, maintaining maximum suction power. They typically connect more securely and are less likely to disconnect during use.
Universal attachments offer flexibility and often provide specialized functions that your vacuum brand might not offer. While they might require an adapter to fit properly, they expand your cleaning options dramatically.
For most homeowners, a combination approach works best: use brand-specific attachments for basic functions and add universal attachments for specialized cleaning tasks your vacuum brand doesn’t address.
Quality Considerations
Like most cleaning tools, dusting attachments range from budget-friendly basics to premium options. Here’s what separates the good from the average:
Connection security: Quality attachments lock firmly into place without disconnecting during use.
Material durability: Better attachments use tear-resistant materials that withstand frequent use without cracking or breaking.
Bristle retention: On brush attachments, bristles should stay firmly attached rather than shedding during cleaning.
Weight balance: Well-designed attachments distribute weight evenly, reducing strain during extended overhead cleaning.
Investing in better-quality attachments typically pays off through longer lifespan and more effective cleaning, though even budget options are better than not using attachments at all.
Mastering Hard-to-Reach Areas
With the right dusting tools, those previously impossible-to-reach areas become part of your regular cleaning routine. Here’s how to tackle the toughest spots:
Ceiling Fan and Light Fixture Cleaning
Ceiling fans collect incredible amounts of dust that can spread throughout your room when the fan runs. To clean them effectively:
- Attach your extension wand to reach the fan height
- Connect a soft brush attachment to capture dust without scratching
- Vacuum each blade from base to tip, starting with the top surface
- Repeat for the bottom of each blade
- Use the same setup to gently vacuum light fixtures
For fans with significant dust buildup, consider placing a pillowcase over the blade, then sliding it off to capture the majority of dust before vacuuming the remainder.
Above-Cabinet Dust Removal
The space between your kitchen cabinets and the ceiling collects grease, dust, and cooking residue. This mixture can become sticky and difficult to remove. Here’s the approach:
- Use your extension wand with a crevice tool to first remove loose particles
- Switch to a soft brush attachment for a more thorough cleaning
- Work from one end to the other in overlapping strokes
- For sticky residue, slightly dampen a microfiber cloth, attach it to your brush attachment, and repeat the process
This area typically needs attention only every 3-4 months in most homes, but cleaning it regularly prevents buildup that becomes much harder to remove.
Tackling Cobwebs in High Corners
Cobwebs seem to appear overnight in ceiling corners and high window frames. The trick to removing them completely:
- Attach your extension wand with a soft brush attachment
- Start from the highest point, working downward
- Use slow, deliberate movements to prevent webs from floating away
- Vacuum in multiple directions to capture all strands
The key is using slow, methodical movements rather than quick swipes that might miss some of the web strands.
Window Blinds and Track Cleaning
Blinds trap dust between slats and in the mechanisms that raise and lower them. For thorough cleaning:
- Use a brush attachment with your vacuum set to low suction
- Close the blinds completely and vacuum horizontally along each slat
- Reverse the blinds and repeat on the other side
- Use a crevice tool in the window tracks and around the blind mechanism
For very dusty blinds, working from top to bottom prevents dust from falling onto already-cleaned slats.
Protecting Delicate Surfaces
Some areas need dust removal but require a gentler touch. The right attachments and techniques protect delicate items while still cleaning effectively.
Electronics and Screens
Modern homes contain dozens of dust-prone electronics, from TVs to computers. To clean them safely:
- Use a soft brush attachment with very low suction
- Keep the brush moving continuously to prevent suction marks
- Maintain at least a half-inch distance from screen surfaces
- Work from top to bottom on vertical screens
For computer keyboards, a small crevice tool helps remove dust and debris between keys without damaging the electronics.
Books and Collectibles
Books and collectibles often have intricate details that trap dust but can be damaged by rough handling. For these items:
- Use a soft brush attachment with minimal suction
- Keep the attachment moving to prevent suction marks
- For books, hold them closed firmly while vacuuming the top edges (the text block)
- For figurines and collectibles, maintain some distance between the attachment and the item
Consider dusting especially valuable collectibles inside a pillowcase with the vacuum nozzle held against the outside – this creates gentle suction while providing a protective barrier.
Fabric Items and Upholstery
Lampshades, curtains, and delicate upholstery need dust removal without damage to the fabric. The approach:
- Use an upholstery attachment or soft brush
- Reduce your vacuum’s suction power if possible
- Work in the direction of the fabric nap or weave
- Use gentle, overlapping strokes rather than pressing firmly
For very delicate fabrics like silk lampshades, place a nylon stocking over your brush attachment to provide an extra layer of protection while still allowing effective dust removal.
Creating an Efficient Dusting Routine
With the right tools, you can create a dusting system that keeps your home cleaner with less effort. Here’s how to develop an effective routine:
Planning Your Dusting Sequence
The order of your dusting matters. Always work from:
- Top to bottom (gravity pulls dust downward)
- Inside to outside (pushing dust out of your living spaces)
- Clean to dirty (starting with less soiled areas)
A logical sequence might be:
- Ceiling fixtures and fans
- Crown molding and upper walls
- Wall hangings and tall furniture
- Mid-level surfaces
- Lower furniture and baseboards
- Floors
This approach prevents you from re-dusting areas you’ve already cleaned.
Frequency Recommendations
Not all areas need the same dusting schedule. Here’s a practical timeline:
Weekly dusting:
- Tabletops and visible surfaces
- Electronics and entertainment centers
- Bookshelves and display areas
Monthly dusting:
- Ceiling fans
- Light fixtures
- Top of kitchen cabinets
- Window blinds
- Behind and under furniture
Seasonal dusting:
- Crown molding
- High shelving
- Above-cabinet spaces
- HVAC vents and returns
This staggered approach makes the job manageable while keeping your home consistently clean.
Combining Wet and Dry Dusting
Some surfaces benefit from combining vacuum dusting with damp cleaning. The key is always to vacuum first, then follow with a damp cloth if needed.
Areas that benefit from this two-step approach include:
- Kitchen cabinet tops (which collect greasy dust)
- Window sills and tracks
- Baseboards in high-traffic areas
- Door frames and tops of doors
Removing loose dust with vacuum attachments first prevents creating mud when you follow with a damp cloth.
Maintenance and Care of Dusting Tools
Your dusting tools can only work effectively if they’re properly maintained. Here’s how to keep them in top condition:
Cleaning Your Attachments
Dust and debris can clog your attachments, reducing their effectiveness. To keep them working properly:
- After each use, check for hair and string wrapped around brush bristles and remove them
- Monthly, soak removable brush attachments in warm soapy water, rinse thoroughly, and allow to dry completely
- For non-removable brushes, use compressed air to blow out embedded dust
- Clean connection points with a cotton swab to ensure a tight seal
Remember that plastic attachments can become brittle if left in direct sunlight, so store them in a cool, dry place when not in use.
Signs It’s Time for Replacement
Even well-maintained attachments eventually wear out. Look for these indicators that it’s time for replacement:
- Cracks in the attachment body that affect suction
- Bristles that have become too soft or are falling out
- Connection points that no longer create a tight seal
- Visible wear that affects cleaning performance
- Attachments that disconnect frequently during use
Most quality attachments should last 3-5 years with regular use, though specialty tools used less frequently may last much longer.
DIY Repairs for Common Issues
Before replacing attachments, try these simple fixes:
Weak connection: Clean both the attachment and vacuum connection point thoroughly. Apply a tiny amount of petroleum jelly to create a better seal if needed.
Cracked attachment: For minor cracks, clear epoxy can sometimes provide a temporary repair.
Bristle issues: Trim any uneven bristles with scissors to create a more uniform cleaning surface.
Reduced suction: Check for and clear any clogs in the attachment itself, which can restrict airflow.
While these fixes may extend an attachment’s life, be prepared to replace tools that are significantly worn.
Advanced Dusting Tool Integration
Once you’ve mastered basic dusting tools, you might want to explore advanced options for even more effective cleaning.
Combining Multiple Attachments
Some cleaning challenges require creativity. Try these combinations:
Extension wand + crevice tool + microfiber cloth: Secure a microfiber cloth over the crevice tool with a rubber band for dusting in extremely narrow spaces.
Brush attachment + old sock: Place a clean sock over a brush attachment for cleaning delicate blinds or collectibles.
Multiple extension wands: Connect two or more wands for extraordinary reach in homes with vaulted ceilings.
Adapters for Cross-Brand Compatibility
Adapter kits allow you to use attachments from different vacuum brands. These typically include:
- Stepped adapters that fit multiple tube diameters
- Brand-specific conversion rings
- Universal connector sets
With the right adapters, you can assemble the perfect toolkit regardless of what brand your vacuum or attachments are.
DIY Attachment Modifications
Sometimes the perfect tool doesn’t exist commercially. Consider these modifications:
Soft fabric covers: Sew simple covers for existing attachments to clean extremely delicate items.
Extended reach claw: Attach a flexible grabber tool to your extension wand to remove cobwebs from extremely high places.
Bottle brush addition: Secure a small bottle brush to your crevice tool for cleaning tight spaces with texture.
While commercial attachments work for most situations, these DIY approaches can solve unique cleaning challenges.
Conclusion
Dust doesn’t have to win the battle for your home. With the right vacuum dusting tools and techniques, you can keep every surface clean – even those that once seemed impossible to reach. By extending your vacuum’s capabilities through thoughtful attachment selection, you’ll save time, improve your home’s air quality, and enjoy a consistently cleaner living space.
The key is approaching dusting systematically: assess your home’s specific needs, invest in quality attachments that address those needs, and develop a routine that makes the best use of your tools. With this approach, you can transform your vacuum from a simple floor cleaner into a whole-home dust management system.
Don’t be afraid to experiment with different attachments and techniques. What works perfectly in one home might need adjustment in another. Through some trial and error, you’ll discover the perfect combination of tools and methods for your specific living space – and you’ll breathe easier in your dust-free home.

