Mastering the Art of Accessory Walls: How to Create Visible Yet Elegant Tool Organization
Discover how to create a functional accessory wall that turns tool organization into a design feature rather than an eyesore. Balance visibility with aesthetics for a workshop you’ll love.
This post may contain affiliate links. If you make a purchase through these links, we may earn a commission at no additional cost to you.
The frustration is universal—you’re in the middle of a project, momentum building, when suddenly you need that specific wrench or specialized bit. Minutes tick by as you rummage through drawers and toolboxes, your creative flow completely disrupted. This common workshop experience stands in stark contrast to the satisfaction of glancing at a well-organized wall where every tool has its place, visible at a moment’s notice.
Most workshop organization solutions force an uncomfortable choice: functional but industrial-looking systems that prioritize utility over aesthetics, or attractive storage that sacrifices accessibility. This false dichotomy has long plagued craftspeople, DIY enthusiasts, and professional tradespeople alike. Yet the workshop should be more than merely functional—it should inspire creativity while supporting productivity.
This is where the concept of accessory wall development enters the picture. Unlike traditional tool storage, an accessory wall transforms organization into a design feature rather than an eyesore. It elevates tool storage from simple utility to thoughtful curation, striking that elusive balance between complete visibility and aesthetic harmony.
The evolution of tool organization has come a long way from the humble pegboard sheets that gained popularity in mid-century workshops. Today’s accessory walls incorporate design principles, material science, and organizational psychology to create systems that work with both your hands and your eyes. Modern workshops feature everything from precision-milled French cleat systems to industrial-chic metal grid panels, all carefully developed to support workflow while enhancing the workshop environment.
The benefits of a well-designed tool wall extend far beyond simple organization. An effective accessory wall improves efficiency through reduced search time and streamlined workflows. It provides constant visual inspiration as the tools themselves become part of your workshop aesthetic. The vertical arrangement maximizes valuable floor space in typically constrained workshops. Perhaps most importantly, a thoughtfully developed accessory wall creates genuine pride in your workspace—transforming a purely utilitarian area into one that showcases both your tools and your organizational craftsmanship.
In this comprehensive guide, we’ll explore the psychology behind effective tool organization, evaluate different accessory wall systems for their functional and aesthetic merits, and provide detailed guidance on designing, building, and maintaining your own workshop masterpiece. Whether you’re a woodworker with heirloom-quality hand tools, a mechanic with specialized equipment, or a DIY enthusiast with an evolving collection, you’ll discover approaches to create a tool organization system that’s as pleasing to the eye as it is practical for your work.
Understanding the Psychology Behind Tool Organization
The concept of keeping tools visible rather than tucked away in drawers or cabinets isn’t merely about convenience—it’s rooted in cognitive psychology. When tools remain visible, your brain doesn’t need to recall where items are stored, eliminating the mental load of remembering complex organizational systems. This visibility creates what psychologists call “external cognition,” where the environment itself serves as an extension of your memory.
Workshop efficiency soars when tools can be located at a glance. Studies have shown that professionals in various trades can lose up to 30% of their productive time searching for misplaced items. The brain processes visual information approximately 60,000 times faster than text, explaining why visible organization dramatically improves workflow. This immediate visual recognition allows craftspeople to maintain their creative momentum without interruption.
However, visibility alone isn’t sufficient for an optimal workshop environment. When tool storage becomes visually overwhelming, cognitive overload occurs—the very chaos you sought to eliminate simply moves from physical disorganization to visual clutter. This visual noise creates stress and actually reduces productivity by overwhelming the senses. The human brain naturally seeks order and pattern, which explains why haphazardly hung tools create subtle but persistent mental tension.
The most effective accessory walls strike a delicate balance. They keep tools accessible while creating visual calm through intentional arrangement. This balance supports what psychologists call “flow state”—that optimal condition where creativity and productivity merge seamlessly. An organized yet attractive tool wall creates environmental conditions that foster this desirable mental state.
Your workshop functions simultaneously as both practical workspace and creative environment. The aesthetic quality of this space impacts your psychological relationship with the work performed there. Craftspeople report greater satisfaction and project outcomes when working in environments they find visually appealing. The workshop becomes a reflection of the craftsmanship that occurs within it—attention to detail in organization foreshadows attention to detail in projects.
By understanding these psychological principles, you can design an accessory wall that doesn’t just store tools but actively enhances your capacity for quality work. The most successful tool organization systems acknowledge these cognitive elements, creating harmony between function and form that supports both productivity and creativity.
Evaluating Different Accessory Wall Systems
The foundation of any successful tool organization strategy begins with selecting the appropriate wall system. Each approach offers unique advantages and aesthetic possibilities, allowing you to match your system to both functional requirements and design preferences.
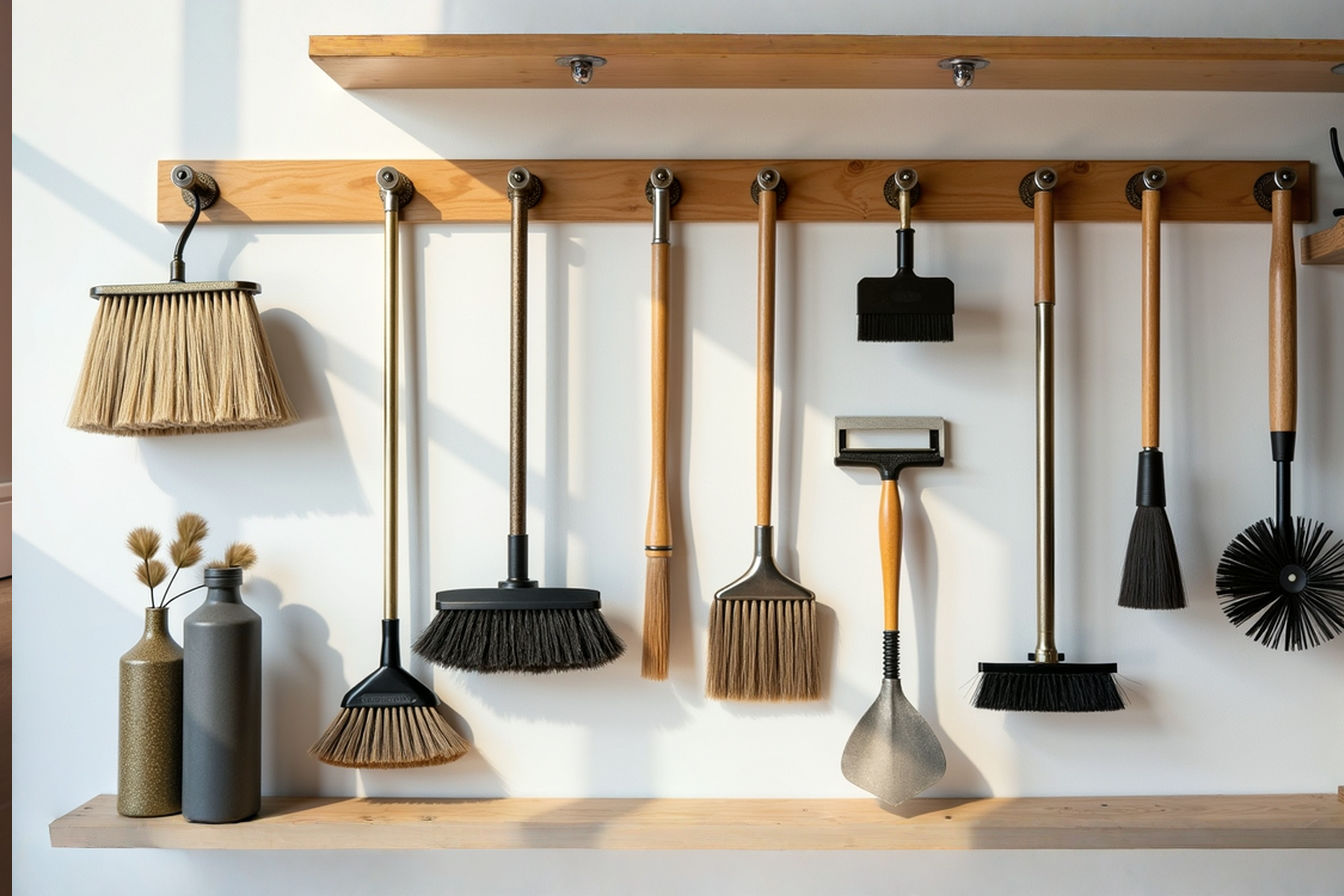
Pegboard systems represent the most familiar and accessible starting point for many. These perforated hardboard panels accommodate a wide variety of hooks and hangers, making them extraordinarily versatile. Modern pegboards have evolved beyond the basic brown hardboard of yesteryear, now available in various colors, materials, and hole patterns. Their primary advantages include affordability, widespread availability of accessories, and ease of installation. Aesthetically speaking, pegboard can appear utilitarian, but contemporary versions with thoughtful framing, custom painting, or decorative hole patterns can elevate this classic system. For the design-conscious, metal pegboards offer increased durability while providing a more refined industrial look.
French cleat systems have gained tremendous popularity among craftspeople seeking both customization and visual appeal. This approach utilizes a series of beveled wood strips mounted to the wall, with matching bevels on custom holders that hook securely into place. The beauty of French cleats lies in their flexibility—each holder can be custom-made for specific tools and positioned anywhere along the cleats. From an aesthetic perspective, these systems excel, particularly when crafted from quality hardwoods with careful attention to joinery and finishing. The wooden construction brings warmth to the workshop while showcasing the very woodworking skills practiced there. The visual rhythm created by the horizontal cleat lines provides an organizational framework that’s inherently pleasing to the eye.
Slatwall and track systems offer commercial-grade solutions with clean, contemporary appearances. Originally developed for retail displays, these systems feature horizontal channels that accept specialized hooks and brackets. The advantages include incredible strength, modular flexibility, and a refined look that works particularly well in modern workshop environments. Available in materials ranging from PVC to aluminum to hardwood composites, slatwall can complement virtually any design aesthetic from industrial to Scandinavian minimalist. Their continuous horizontal lines create a sense of order even before tools are mounted.
Magnetic tool organization represents the most visually minimalist approach. Strong rare-earth magnets embedded in panels or strips hold metal tools directly to the surface without visible mounting hardware. This creates an exceptionally clean look where tools appear to float against the background. Magnetic systems work beautifully for wrenches, metal-handled tools, and many shop accessories. The aesthetic impact is particularly striking against wood backings, where the contrast between organic wood grain and precise metal tools creates visual drama. However, these systems require careful consideration for tools with plastic components or where magnetism might be problematic.
Custom wood panel systems offer unlimited creative possibilities for craftspeople seeking unique solutions. By fabricating specialized holders attached to attractive wood backing panels, these systems can perfectly match specific tool collections while serving as workshop art. The grain patterns and natural coloration of different wood species become design elements themselves. Figured maple, walnut, cherry, and other premium hardwoods transform utilitarian storage into showcase displays. Though requiring the most woodworking skill to create, these custom systems often become points of pride that reflect the craftsperson’s attention to detail.
Metal grid and panel systems provide industrial aesthetics with exceptional durability. From simple wire grids to perforated metal panels, these systems offer tremendous strength while creating interesting visual textures through their regular patterns. The industrial look works particularly well in contemporary workshops and garages. Metal systems can be painted to complement existing color schemes or left in their natural state for a raw, workshop-authentic appearance. The inherent rigidity of metal allows for excellent tool support without the visual bulk of some other systems.
Many experienced workshop owners ultimately develop hybrid systems that combine elements from multiple approaches. A French cleat framework might incorporate magnetic strips for metal tools, custom wood holders for specialty items, and metal grid sections for lightweight accessories. These thoughtfully combined systems leverage the strengths of each approach while creating visual interest through material variation. The key to successful hybrid systems lies in maintaining consistent design language across the different elements to create cohesion rather than confusion.
The ideal system balances your specific functional needs with the aesthetic direction that inspires your best work. Consider starting with a smaller wall section to experiment with different approaches before committing to a full workshop implementation.
Designing Your Accessory Wall Layout
Creating an effective accessory wall begins long before the first tool finds its place. Thoughtful layout design serves as the foundation for both functionality and visual appeal. The most successful tool walls result from deliberate planning rather than haphazard hanging.
Start by analyzing both your workspace and tool collection. Consider the physical dimensions available, lighting conditions, and relationship to workbenches and machinery. Comprehensive tool inventories help identify not just what needs storage today, but what might require accommodation tomorrow. Categorize tools by type, size, frequency of use, and project applications to inform logical groupings. This analysis provides the raw data from which your design will emerge.
Workflow mapping transforms tool organization from static storage to dynamic support for your craft. This process involves identifying the sequence of tools used in common projects and arranging them to minimize movement. Tools used together should be stored together, regardless of type or size. Frequently used items deserve prime real estate at eye level within easy reach, while occasional-use specialties can occupy higher or lower positions. Creating task-specific zones—measuring and marking in one area, cutting tools in another, for example—further enhances workflow efficiency.
Beyond pure function, the visual rhythm of your tool arrangement contributes significantly to both access and aesthetics. Human perception naturally seeks pattern and order. Creating intentional arrangements—graduating sizes, repeating shapes, or aligning similar tools—satisfies this innate preference while making specific tools easier to locate. This visual organization eliminates the cognitive overload that occurs when facing chaotic arrangements. Professional workshops often employ silhouette techniques, where tools create visually distinct outlines against contrasting backgrounds.
Color plays a powerful yet often overlooked role in tool organization psychology. Tool manufacturers use vibrant colors to differentiate their products, which you can leverage in your organization scheme. Grouping similar colors creates visual cohesion, while strategically placed bright items can serve as visual landmarks. Some craftspeople even modify tool handles or add colored tape markers to enhance visual organization. Background colors should be chosen carefully—light colors maximize visibility while dark tones create dramatic contrast that highlights tool shapes.
The tension between symmetry and asymmetry forms another critical design consideration. While perfect symmetry provides immediate visual satisfaction, it can paradoxically make finding specific tools more difficult as everything blends together. Thoughtful asymmetry, with intentional focal points and varied groupings, often creates more functional and visually interesting arrangements. The key is creating balanced asymmetry rather than random placement.
Zoning techniques bring additional structure by creating distinct visual and functional areas within the larger wall. These zones might be demarcated by different backing materials, subtle changes in mounting height, or small gaps between sections. Such divisions help the brain quickly narrow its search field when looking for specific tools. Consider zones for hand tools, power tool accessories, measuring instruments, and fastening systems.
Design principles like the golden ratio (approximately 1:1.618) can be subtly incorporated to create inherently pleasing proportions. This ratio, found throughout nature and classical architecture, can inform the relationship between different sections of your tool wall or the proportion of filled space to negative space. Even without mathematical precision, aiming for these time-tested proportional relationships enhances the overall aesthetic impact of your organization system.
Your final design should balance immediate functional needs with flexibility for future evolution. The most successful accessory walls incorporate some open space, allowing for collection growth and seasonal project variations without complete reorganization.
Material Selection for Attractive Functionality
The materials you select for your accessory wall do far more than provide mounting surfaces—they establish the aesthetic foundation of your entire system while determining its long-term durability. Thoughtful material choices balance visual appeal, functional requirements, and practical considerations like weight capacity and maintenance.
Backing materials create the canvas against which your tools will display. Plywood offers excellent structural integrity with various appearance options depending on species and grade. Baltic birch provides a clean, contemporary look with its uniform edge layering, while furniture-grade hardwood plywood brings rich grain patterns that add visual warmth. MDF (medium-density fiberboard) creates a perfectly smooth, paintable surface ideal for contemporary workshops where color rather than grain becomes the focus. For industrial aesthetics, consider metal backers like perforated steel or aluminum panels, which provide exceptional strength while creating interesting visual texture through their pattern repetition.
Wood species selection dramatically influences both appearance and performance when constructing French cleats or custom holders. Hardwoods generally offer superior strength and wear resistance compared to softwoods. Oak provides exceptional durability with pronounced grain that creates visual interest. Maple offers tremendous strength with a lighter, more uniform appearance that helps tools stand out visually. Walnut introduces rich, dark tones that create dramatic contrast with tool metals. Cherry evolves over time, its initially light color deepening to rich amber tones with exposure to light. Beyond appearance, consider workability—some exotic hardwoods offer striking aesthetics but prove challenging for creating precision tool holders.
Metal components introduce another dimension of material consideration. Stainless steel provides modern elegance with outstanding durability, though at higher cost. Powder-coated steels offer endless color possibilities while resisting corrosion. Aluminum combines lightweight properties with contemporary appearance, making it ideal for larger organizational components. Even within these categories, finish options—from brushed to mirror-polished—significantly impact the final aesthetic. Industrial workshops might embrace raw, unfinished steel that develops natural patina over time, while design-forward spaces might incorporate colored anodized aluminum components.
Material combinations often yield the most visually interesting results. The contrast between wood warmth and metal precision creates particularly striking effects. Consider wood-framed metal grid sections, hardwood-faced plywood with metal accents, or metal-reinforced wooden components that combine strength with aesthetic appeal. These thoughtful combinations not only enhance appearance but can strategically address functional requirements, placing stronger materials where durability matters most.
Durability considerations should influence material selection for different components. Wall-mounted backing systems must provide reliable structural support, suggesting materials with excellent screw-holding capacity and dimensional stability. Tool holders that experience frequent use or support heavy items require materials with superior wear resistance and strength. Consider edge treatments and surface finishes that will maintain appearance despite workshop conditions.
Cost analysis reveals that material selection often represents a worthwhile investment rather than an area for economizing. While premium hardwoods and metals cost more initially, their longevity and continued aesthetic appeal provide excellent long-term value. Nevertheless, strategic material selection can optimize your budget—using showcase materials for visible elements while employing more economical options for structural components or less visible areas. The resulting system will provide years of functional service while continuing to inspire your best work.
Beyond the materials themselves, finishing techniques significantly impact both appearance and performance. For wooden components, consider how different oil finishes enhance grain patterns versus film finishes that provide more protection. Even within these categories, options abound—from hand-rubbed linseed oil that deepens wood tones to water-based polyurethanes that preserve natural coloration. Metal components might benefit from clear protective coatings to prevent fingerprints and corrosion without altering their appearance.
The most successful material selections align with your overall workshop aesthetic while providing the necessary functional performance. Your choices should reflect both practical requirements and the visual environment that inspires your creativity.
Building Your Base System
With design plans formulated and materials selected, the process of constructing your accessory wall begins with establishing a solid foundation system. This critical infrastructure will support everything that follows, making careful installation essential for both safety and satisfaction.
The French cleat system represents one of the most versatile and visually appealing approaches. Begin by determining the vertical spacing between cleats—typically 6 to 8 inches provides versatility without excessive material use. Using hardwood or quality plywood, cut strips 3 to 4 inches wide with a 30 to 45-degree bevel along one edge. Mount these strips to the wall with the bevel facing downward, ensuring they’re perfectly level and secured into wall studs with appropriate screws. The precision of this installation determines the system’s integrity, so take time to locate studs accurately and verify level placement. For enhanced aesthetics, consider recessing the mounting screws and filling the holes with matching wood plugs. Complete the system by installing vertical end caps that prevent tools from sliding off the ends of the cleats. These caps provide an opportunity for design details that elevate the overall appearance.
Pegboard installation benefits from similar attention to detail. Rather than mounting directly to wall surfaces, create a framework of furring strips that provides space behind the board for hook ends. This framework also offers the opportunity to frame the pegboard decoratively, transforming utilitarian material into a more finished appearance. Consider painting the pegboard before installation—light colors maximize visibility, while darker tones create dramatic tool silhouettes. For truly distinguished pegboard systems, frame sections in contrasting hardwood or add decorative molding to elevate the industrial material into a featured workshop element.
Custom panel systems require more specialized fabrication but offer unmatched aesthetic potential. Create a framework attached securely to wall studs, then overlay with your chosen panel material. This approach allows for interesting combinations, such as recessed sections of contrasting materials or integrated lighting elements. The framework can incorporate French cleats for larger modular panels or direct mounting for permanent installations. Consider how panels join—whether with revealed gaps that become part of the design, seamless butt joints, or decorative edge treatments that frame each section.
Regardless of system type, mounting considerations require careful attention. Always identify and utilize wall studs for primary structural support. In workshop environments with concrete or masonry walls, use appropriate concrete anchors rated for the expected load. Consider the combined weight of both the system and tools—particularly for areas holding heavy items like hammers or large wrenches. Provide additional reinforcement around areas of concentrated weight. Throughout installation, periodically test the security of the mounting by applying downward pressure.
Ensuring proper load capacity extends beyond wall attachment to the organizational system itself. French cleats should be sized appropriately for their intended load—heavier tools require wider cleats with deeper bevels. Custom holders should include reinforcement at stress points and appropriate joinery techniques rather than relying solely on glue. Metal components should use gauge appropriate to their load-bearing requirements. Throughout the system, overbuilding slightly provides peace of mind and long-term reliability.
Finishing techniques elevate the base system from purely functional to aesthetically pleasing. For wooden components, sand progressively through grits up to at least 220 for a smooth surface that’s pleasant to touch. Apply finish consistently, ensuring complete coverage including less visible areas. Consider how the finish will interact with future handling—some options provide better protection against the natural oils in hands, preventing discoloration over time. Metal components benefit from deburring edges and applying appropriate protective treatments.
Lighting integration transforms a good accessory wall into an exceptional one. Consider incorporating LED strip lighting along the top edge of the system, providing both general illumination and dramatic highlighting of tool silhouettes. For precision work areas, adjustable task lighting mounted directly to the organizational system ensures perfect illumination where needed. Even simple under-cabinet lighting strips can dramatically enhance both visibility and appearance with minimal investment. The interplay of light and shadow across various tools and materials adds visual dimension that enhances the overall aesthetic impact.
Throughout construction, maintain the same level of craftsmanship you would apply to fine furniture or presentation projects. This attention to detail not only ensures functional longevity but transforms utilitarian storage into a workshop feature worthy of the tools it displays.
Customizing Tool Holders and Accessories
The true character of your accessory wall emerges through the custom holders and accessories that accommodate your specific tool collection. While the base system provides the framework, these specialized components determine both functionality and visual identity.
Designing custom tool holders begins with careful measurement of each tool, considering not just dimensions but also weight distribution, ergonomic access, and visual presentation. Effective holders simplify both removal and replacement while displaying tools advantageously. Rather than generic solutions, create holders that embrace the unique characteristics of each tool—the curve of a handle, the balance point of a hammer, or the need to protect delicate cutting edges. This precision-fit approach not only improves functionality but creates visual harmony through thoughtful conformity to tool shapes.
Consistent design language across different holder types unifies your system visually. Develop signature elements that repeat throughout your accessories—perhaps a standard edge profile, consistent corner radius, or distinctive joinery technique. This design consistency creates cohesion even when holder functionality varies dramatically. Consider developing a modular approach where standard-sized bases accept different specialized holders, creating visual rhythm through repeated elements while maintaining complete customization.
Material selection for holders and accessories involves both practical and aesthetic considerations. Hardwoods provide excellent durability for frequently accessed tools, while softer woods might better cradle delicate instruments. Consider using contrasting species to highlight different tool categories or create visual interest. Plywood offers exceptional strength for complex shapes, particularly when edge grain is strategically oriented for maximum strength. Metal components introduce precision and durability for high-wear applications. Acrylic or other modern materials can provide interesting translucent qualities while offering excellent durability.
Techniques for creating precision-fit tool storage range from simple to sophisticated. Basic approaches include trace-and-cut methods, where tool outlines guide the creation of supportive shapes. More advanced techniques utilize router templates, creating perfectly matched recesses for specific tools. French cleat enthusiasts often develop modular blocks with specialized cutouts that attach to standard cleats. For metal tools, magnetic systems embedded within wooden holders provide invisible support with clean aesthetics. The most sophisticated systems might employ digital fabrication techniques like CNC routing to create perfectly matched tool cavities.
Color coding introduces another organizational dimension while enhancing visual appeal. Consider applying subtle color elements to group related tools or indicate categories. This might involve colored back panels, painted holder edges, or even coordinated tool handles. The most effective color systems use a limited palette to prevent visual chaos while providing clear organizational cues. Some craftspeople create color zones that correspond to different project types or workflow stages.
The balance between DIY and purchased accessories depends on your specific skills, tools, and time constraints. Creating every holder from scratch provides maximum customization but requires significant time investment. Commercial accessories offer convenience and professional finishing but may lack perfect fit for specialized tools. Many successful systems combine these approaches strategically—custom-building critical specialty holders while incorporating manufactured solutions for standard tools. Even purchased accessories can be modified or refinished to align with your overall aesthetic vision.
Future-proofing your system requires thinking beyond current needs to anticipate collection evolution. Create flexible components that can adapt to new acquisitions. Consider incorporating some adjustable elements that accommodate various sizes within a tool category. Modular approaches allow for easy reconfiguration as your collection or projects change. Some forward-thinking craftspeople create templates for their custom holders, facilitating quick reproduction if needs change or components wear out.
The most successful accessory walls reflect the personality of their creator while perfectly supporting their specific workflow. Your specialized holders and accessories should feel like natural extensions of both your tools and your work style, creating an organizational system that’s uniquely yours.
Arranging Tools for Maximum Visual Impact
The final step in accessory wall development transforms functional organization into visual artistry through thoughtful tool arrangement. This crucial phase determines whether your system merely stores tools or creates an inspirational workshop centerpiece.
Silhouette techniques represent one of the most effective approaches for instant tool recognition. By arranging tools to create distinctive outlines against a contrasting background, you enable immediate visual identification. This approach works particularly well for similar-looking items like wrenches or screwdrivers, where shape variation might be subtle. Position these tools to maximize their distinctive features—splaying open-end wrenches to highlight size differences or arranging screwdrivers to emphasize handle variations. The resulting patterns create visual interest while improving functionality.
Color arrangement strategies add another dimension to organization. Consider how your tools’ existing colors can create visual harmony or intentional contrast. Groups of similar-colored tools can form visual blocks that simplify location, while intentional color transitions create pleasing gradients across the wall. Some craftspeople arrange tools from light to dark or follow color wheel relationships. Tools with distinctive colors—the yellow of DeWalt, the red of Milwaukee, the blue of Bosch—can serve as visual landmarks within the larger arrangement. Even tools without bright colors create subtle variations in metal tones that can be leveraged for visual effect.
Grouping methods provide organizational logic while contributing to aesthetic appeal. Function-based grouping keeps related tools together, supporting workflow efficiency. Size-based arrangements create visually pleasing progressions while maximizing space utilization. Type grouping creates zones of visual similarity that help the brain quickly locate needed items. Some craftspeople even arrange partially by visual appeal, treating their most beautiful tools as focal points within the larger organization. The most effective systems typically combine these approaches, creating primary groupings by function with secondary organization by size or visual characteristics.
Creating focal points and visual hierarchy guides the eye naturally across your tool wall. Just as in fine art composition, consider establishing primary, secondary, and tertiary areas of interest. A particularly beautiful hand plane might serve as a central focal point, with supporting tools arranged around it. Alternately, create hierarchical zones based on workflow importance, with everyday tools in prime positions and specialty items in peripheral areas. This intentional composition transforms random storage into a designed experience that both functions effectively and provides visual satisfaction.
The art of negative space plays a crucial yet often overlooked role in tool arrangement. While maximizing storage might suggest filling every available inch, thoughtful spacing between tools or tool groups actually enhances both visibility and aesthetic appeal. These deliberate gaps create visual breathing room that helps define groups, establish rhythm, and prevent visual overload. In design terms, you’re establishing figure-ground relationships where tools become distinct figures against the ground of your backing system. Approximately 20-30% negative space often creates the optimal balance between storage efficiency and visual clarity.
Using contrast enhances visibility while creating visual interest. This might involve positioning dark-handled tools against light backgrounds, arranging hardwood-handled tools against metal panels, or creating deliberate juxtapositions of size and shape. Consider how textural contrast—smooth-finished tools against rough-textured backgrounds, for example—adds another dimension of visual interest. Even the contrast between antique hand tools and modern power tools can create compelling visual narratives across your workshop wall.
Periodic rearrangement keeps your system aligned with evolving needs while providing fresh inspiration. Many craftspeople develop seasonal organizations based on project types—woodworking tools featured prominently during winter indoor projects, garden and outdoor tools accessible during summer months. Others rearrange based on current projects, bringing specific tool sets into prime positions temporarily. This flexibility transforms your tool wall into a dynamic system that evolves with your work rather than remaining statically arranged. Each reorganization also provides an opportunity to clean and maintain both tools and the organizational system itself.
The most successful tool arrangements balance objective organization with subjective visual preferences. While efficiency principles provide important guidelines, your personal aesthetic sense should ultimately guide arrangement decisions. After all, this system exists not just to store tools but to create an environment that inspires your best work.
Maintaining and Evolving Your Accessory Wall
A well-designed accessory wall represents not a finished project but the beginning of an evolving system that grows and improves alongside your craft. Proper maintenance and thoughtful evolution ensure your organization continues providing both functional support and aesthetic satisfaction for years to come.
Regular cleaning and maintenance routines protect both your tools and organizational system. Develop a schedule for dusting surfaces, wiping down tools, and inspecting the structural integrity of all components. For wooden elements, occasional refreshing with appropriate oils or waxes maintains appearance while providing protection. Metal components benefit from periodic checking for corrosion and appropriate treatment with protective products. These maintenance sessions provide perfect opportunities to evaluate the overall system effectiveness and identify potential improvements.
Adapting your system as your tool collection grows requires both physical expansion and organizational evolution. Reserve some wall space for future growth whenever possible, allowing seamless addition of new sections. Consider modular approaches where entire panels can be swapped or rearranged to accommodate changing needs. The most successful systems incorporate flexibility from their initial design—adjustable components, standardized mounting systems, and adaptable layouts that accept new elements without complete reorganization.
Seasonal reorganization strategies acknowledge the cyclical nature of many workshop activities. Consider how your tool usage patterns change throughout the year and adjust your organization accordingly. Summer might emphasize outdoor project tools while winter focuses on fine woodworking implements. This periodic reshuffling not only improves functionality but provides fresh perspective on your collection. Some craftspeople document these seasonal arrangements, developing standard layouts that can be efficiently implemented as the calendar changes.
Preventing common issues requires proactive attention to potential problems. Dust accumulation, particularly in workshops with heavy cutting or sanding, necessitates regular cleaning to maintain both function and appearance. Fading from sunlight exposure can affect both tools and organizational components—consider UV protection for workshops with significant natural light. Overloading represents another common issue, where initially secure mounting gradually weakens under excessive weight—conduct periodic load assessments, particularly for frequently used sections. Preventing these issues through regular evaluation maintains both safety and satisfaction.
Documentation methods for perfect tool return solve one of the most persistent workshop challenges—remembering exactly where everything belongs. Simple approaches include photographing sections for reference or creating shadow boards where tool outlines indicate proper positioning. More elaborate systems might incorporate small labels or color-coding elements that guide correct replacement. Digital enthusiasts sometimes create detailed organization maps or inventory systems that track tool locations. Whatever method you choose, effective documentation ensures that your carefully planned organization remains intact even when tools are constantly in use.
The concept of the living wall encourages continuous improvement rather than static completion. View your accessory wall as an ongoing experiment in optimization, regularly questioning whether current arrangements truly serve your needs. Each project provides data about workflow effectiveness that can inform incremental improvements. This iterative approach—trying new arrangements, evaluating results, and implementing refinements—ultimately creates a highly personalized system perfectly attuned to your specific work patterns.
Community sharing and inspiration resources provide fresh ideas for system evolution. Online forums dedicated to workshop organization showcase innovative approaches from craftspeople worldwide. Social media platforms feature countless workshop tours and organizational solutions that might spark new thinking. Local maker spaces and woodworking clubs offer opportunities for in-person inspiration and idea exchange. These external inputs prevent organizational stagnation while fostering continuous improvement. Consider documenting and sharing your own solutions to contribute to this collaborative improvement process.
By embracing this maintenance and evolution mindset, your accessory wall transforms from static storage to dynamic workshop partner—continuously adapting to support your craft while providing daily inspiration through its thoughtful design and organization.
Real-World Accessory Wall Showcase
Theory becomes practice in these real-world examples of exceptional accessory walls. Each case study demonstrates different approaches to the visible-yet-attractive challenge, offering practical inspiration for your own organizational journey.
The Woodworker’s Precision-Oriented Tool Wall showcases the beautiful marriage of functionality and craftsmanship. Master woodworker James Chen developed his system over fifteen years, centering on a quarter-sawn white oak French cleat installation with custom-carved tool holders. What distinguishes Chen’s approach is his emphasis on precision placement based on workflow analysis. “I tracked every step of my most common projects, noting each tool transition,” he explains. This data informed a layout that minimizes movement while creating visual rhythm through thoughtful arrangement. Hand planes occupy a central position, arranged by size to create a pleasing visual cascade. Chisels and layout tools frame this central feature in custom racks that display their classic beauty. Chen incorporated several innovative elements, including integrated LED lighting that eliminates shadows and subtle brass accents that complement the tool metals. His advice for others: “Start with your most beautiful and frequently used tools as focal points, then build the system around them.”
The DIY Enthusiast’s Budget-Friendly But Attractive Solution demonstrates that financial constraints need not limit organizational quality. Sarah Martinez transformed her garage workshop with an accessory wall costing under $300. Her hybrid system combines painted pegboard sections framed in stained pine with strategic zones of metal grid panels. Rather than purchasing expensive specialized holders, Martinez crafted custom solutions from scrap materials. Particularly clever is her use of colored epoxy to fill and strengthen natural wood voids, creating functional art pieces that serve as tool holders. “I wanted a system that wouldn’t make me choose between spending money and having good organization,” she notes. The resulting wall uses color strategically—different pegboard colors define work zones while creating visual interest. Martinez recommends starting with a detailed inventory and prioritizing: “Figure out which 20% of your tools you use 80% of the time, and make those perfectly accessible. The rest can come later.”
The Professional Contractor’s Mobile Adaptable System illustrates how accessory wall principles can extend beyond fixed workshop environments. Carlo Rossi developed an ingenious truck-mounted system that combines the visibility of traditional tool walls with the mobility required for contracting work. His innovation centers on modular panels that transfer between his workshop wall and vehicle mounting points, maintaining consistent organization across locations. “Every minute spent searching for tools costs money,” Rossi explains, “but so does disorganization that leads to forgotten tools.” His system features quick-connect mounting brackets and standardized panel dimensions that allow reconfiguration based on daily job requirements. Particularly notable is his color-coding strategy—each tool category features distinctively colored holders for instant visual recognition even in poor lighting conditions. For others developing mobile systems, Rossi suggests: “Build for the worst conditions you’ll face—vibration, dust, poor light—and everything else becomes easy.”
The Artist’s Inspiration-Forward Tool Organization demonstrates how accessory walls can transcend pure functionality to become artistic expressions themselves. Mixed-media artist Elena Whitman approached her tool organization as another creative canvas. Her system features a dramatic black-stained plywood backing that makes colorful art tools pop visually. Rather than hiding the organizational system, Whitman incorporated it into her studio aesthetic, using tool arrangements to create intentional patterns and color stories. Brushes form a spectrum arrangement, while measuring tools create geometric patterns against the dark background. “My tools inspire me, so why wouldn’t I display them as beautifully as finished work?” she asks. Particularly innovative is her use of adjustable components that allow reorganization to reflect current projects or create new visual compositions. Whitman encourages others to “treat your tool wall as a design project worthy of the same attention as client work.”
These diverse implementations share several common elements despite their different approaches. Each system prioritizes visibility without sacrificing aesthetics. All evolved over time rather than emerging fully formed. Each creator emphasized the psychological benefits—reduced frustration, increased inspiration, and enhanced productivity—that their organizational systems provide. The most important shared insight? None consider their systems “finished,” instead viewing them as evolving expressions of their craft that improve with each adjustment and addition.
The lessons from these successful implementations extend beyond specific techniques to broader principles. Start with clear intention rather than haphazard hanging. Embrace iterative improvement rather than seeking immediate perfection. Consider both functional workflow and visual impact in every decision. Perhaps most importantly, infuse your organizational system with the same craftsmanship you bring to your primary work.
Conclusion
The journey from chaotic tool storage to a thoughtfully developed accessory wall transforms more than just organization—it fundamentally changes your relationship with both your tools and workspace. The principles explored throughout this guide converge on a singular truth: visible tool storage need not sacrifice aesthetic quality, and beautiful organization need not compromise functionality. The accessory wall concept resolves this false dichotomy, creating systems that simultaneously support efficiency and inspire creativity.
The key principles for successful tool organization remain consistent regardless of specific implementation. Visibility maximizes efficiency by eliminating search time and maintaining workflow momentum. Thoughtful arrangement creates visual patterns that enhance both tool location and aesthetic appeal. Quality materials and craftsmanship elevate utilitarian storage to workspace feature. Personalization ensures the system perfectly supports your specific needs rather than forcing generic solutions. Flexibility allows evolution alongside your developing craft and changing projects. Together, these principles create organizational systems that work as hard as the tools they contain.
The transformation potential of well-designed accessory walls extends far beyond simple efficiency. Workshop after workshop has been revolutionized through this approach, converting cluttered, frustrating spaces into inspiring environments that enhance both productivity and enjoyment. The psychological impact proves as significant as the practical benefits—reducing stress, increasing focus, and creating genuine pride in the workspace. Many craftspeople report that their improved organization directly translates to improved output, as the external order creates internal creative clarity.
For those just beginning this organizational journey, start small and evolve gradually. Select a single wall section or specific tool category as your initial focus. Apply the principles of visibility, arrangement, quality, personalization, and flexibility to this manageable area. Experience the benefits of this microcosm before expanding to comprehensive organization. This incremental approach allows refinement of techniques and preferences without overwhelming commitment. Each successful section builds both skills and motivation for the next stage of development.
Remember that the dual benefits of efficiency and inspiration remain your guiding stars throughout this process. Every decision—from system selection to material choice to tool arrangement—should advance both objectives simultaneously. When forced to prioritize, consider which tools most directly impact your specific workflow and which organizational elements most significantly influence your workspace satisfaction. These high-impact areas deserve your initial attention and greatest investment.
Perhaps most profoundly, your accessory wall ultimately reflects your own craftsmanship. The care invested in tool organization mirrors the attention to detail expressed in your primary creative work. A thoughtfully arranged, beautifully constructed organizational system demonstrates the same skills and values that distinguish quality craftsmanship in any medium. The accessory wall becomes not merely storage but a visible manifestation of your approach to craft itself—functional, beautiful, and worthy of the tools it presents.
The time has come to transform your own workspace through accessory wall development. With principles understood and examples considered, you’re prepared to create an organizational system that keeps every tool perfectly visible while enhancing your creative environment. Your workshop deserves this thoughtful marriage of function and form—and so do you.